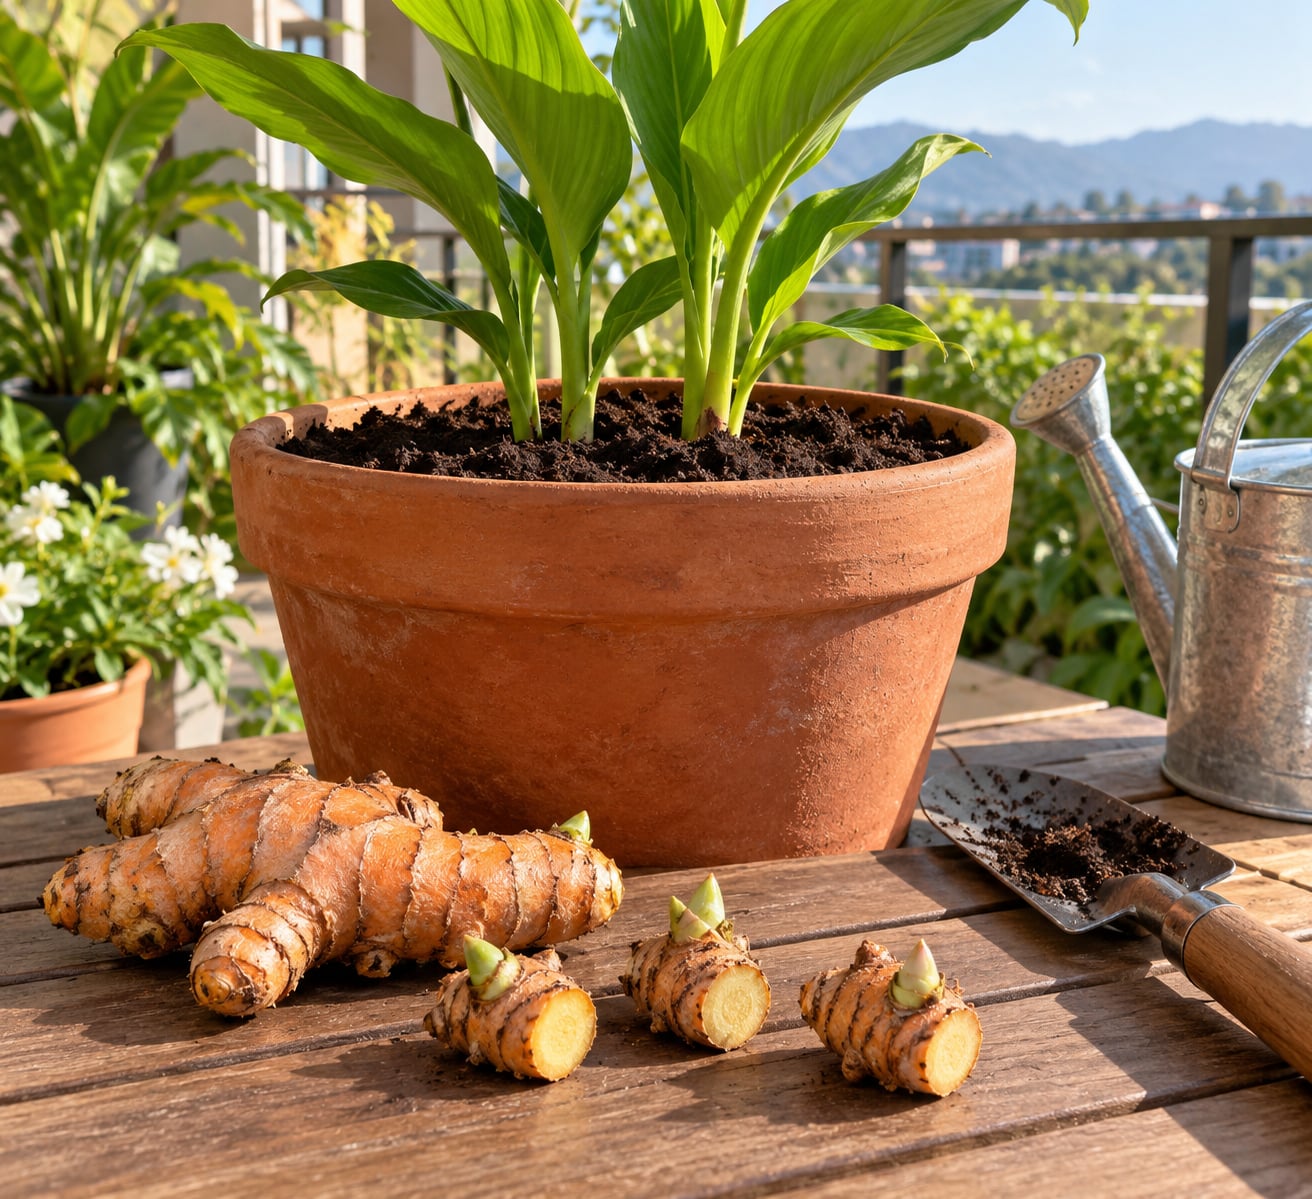
To grow turmeric in containers, you need a pot at least 10 to 12 inches deep with drainage holes, a loose mix of 70 to 80 percent potting soil and 20 to 30 percent aged compost, and a fresh seed rhizome with two or three visible buds. Plant it 2 to 4 inches deep, buds facing up, keep the mix evenly moist and warm, and harvest the new rhizomes about 8 to 10 months later.
Turmeric (Curcuma longa) is a frost-tender perennial in the ginger family, and most of it is grown in the tropics on farms where it stays warm and wet for most of the year. A container changes that. You control the soil, the water and the temperature, which is why a patio, a balcony or a warm windowsill in a cold climate can produce a genuine harvest.
The catch is patience. Turmeric can sit in the soil for 3 to 8 weeks indoors, or 3 to 4 months in cool outdoor spring weather, before a single shoot appears. Growers who pull the pot up too early are the ones who end up with mush.
Table of Contents
- 1What You Need
- 2Step-by-Step: How to Grow Turmeric in Containers
- 31. Choose a Pot with Good Drainage
- 42. Prepare the Potting Mix
- 53. Plant the Turmeric Rhizome Correctly
- 64. Water Lightly and Keep Conditions Warm
- 75. Feed and Support the Growing Plant
- 86. Harvest Turmeric from the Container
- 9Common Mistakes and How to Fix Them
- 10Frequently Asked Questions
- 11How long does it take to grow turmeric in a container?
- 12Can turmeric grow in a pot indoors?
- 13How big should a container be for turmeric?
- 14Why are my turmeric leaves turning yellow?
- 15Do I need to use fertilizer when growing turmeric in containers?
- 16Can I regrow turmeric from a supermarket rhizome?
- 17Conclusion
What You Need
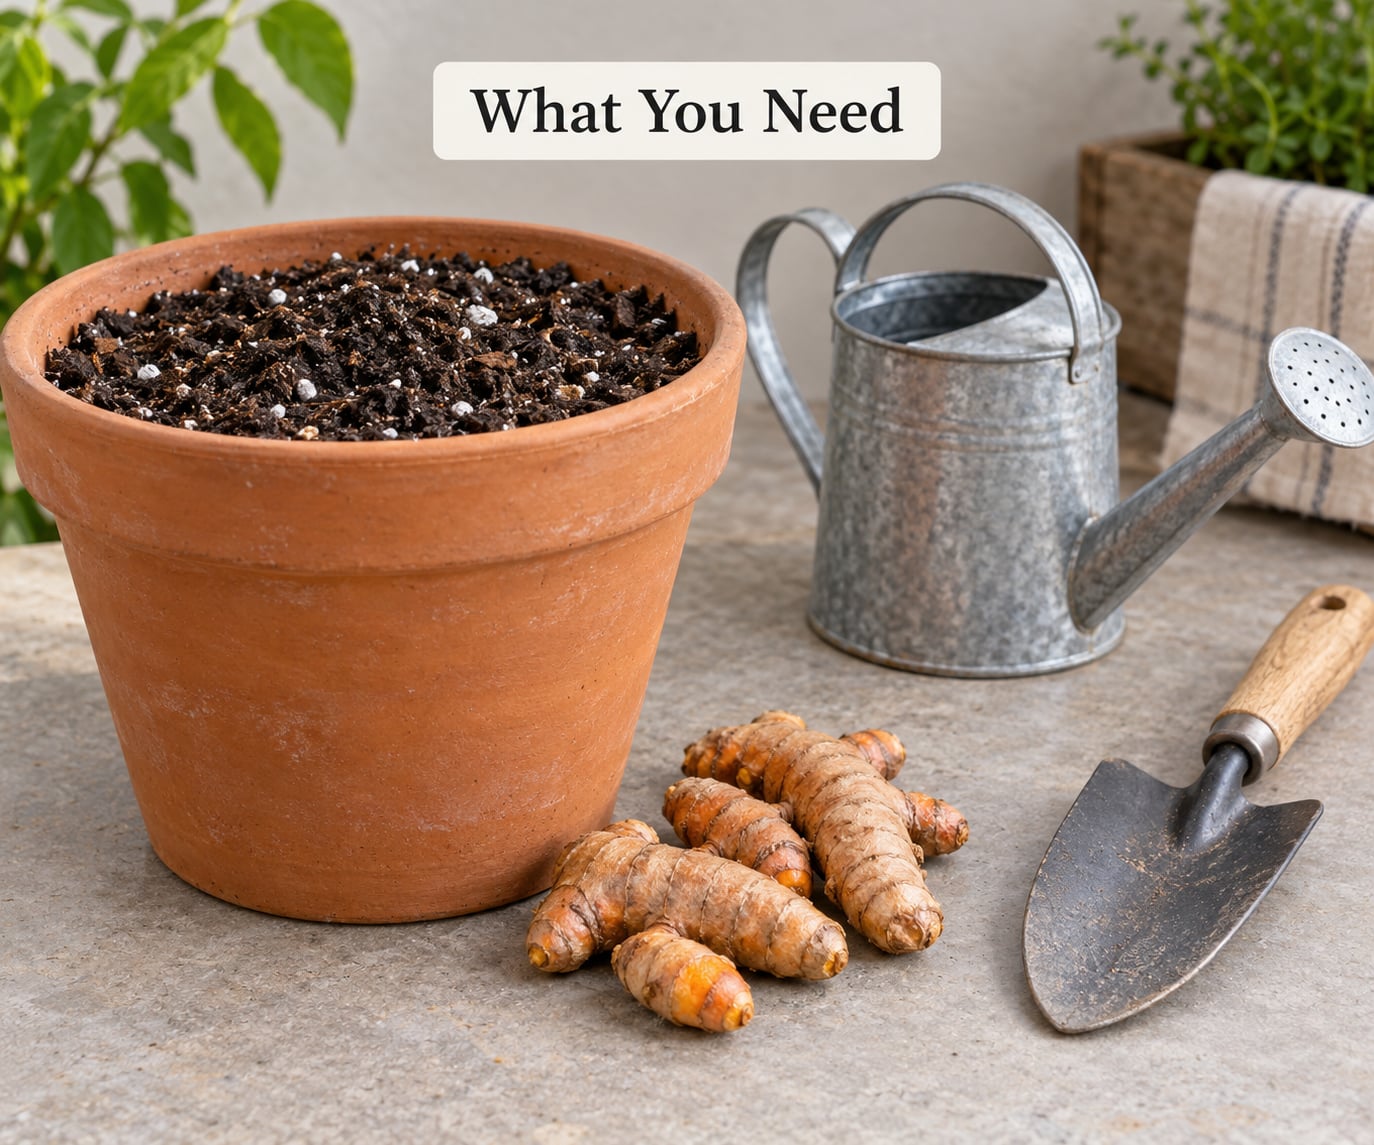
Gather everything before you start, because the seed rhizome should be cut and left to dry a few days before it goes in the ground. Once it is planted, you are committed to a pot that stays in one place for the season.
- A container with drainage holes. A 3 gallon pot is the working minimum, and 5 to 10 gallons gives you a bigger plant and a bigger harvest. Wider is better than deeper-narrow.
- Quality potting soil. A general-purpose organic potting mix, not garden soil, which compacts and drains badly in a closed pot.
- Aged compost. Well-rotted, screened, no chunks of bark still in it.
- A drainage material. Perlite, coarse sand, or a layer of broken pot shards if you are reusing an old container.
- Fresh seed rhizomes. Organic if possible, firm and heavy for their size, with 2 to 3 small green or pale buds.
- A balanced fertilizer. A slow-release organic blend at planting, plus fish emulsion or seaweed extract for liquid feeding.
- Water and a bright, warm spot. Six hours of light at minimum outdoors, or a grow light indoors, plus temperatures of 65 to 90°F.
- A tray or saucer if the pot lives indoors, so runoff water does not stain your windowsill.
One thing worth adding to that list is a hygrometer if you are growing indoors. Turmeric is a tropical plant, and dry apartment air slows growth noticeably. Grouping pots together and standing them on a tray of damp pebbles does more than most people expect.
Step-by-Step: How to Grow Turmeric in Containers
1. Choose a Pot with Good Drainage
Drainage matters more than any other single factor. Turmeric likes its soil consistently moist, not wet, and a pot without holes holds water until the rhizome rots. If you buy one container, buy it with holes in the base.
As a rule of thumb, work from volume and depth together. A 3 gallon nursery pot, roughly 12 to 14 inches across and 12 inches deep, holds one rhizome comfortably and gives a plant about 2 feet tall. A 5 to 10 gallon pot, 14 to 18 inches deep, holds two or three pieces and pushes closer to 3 feet. One 15 inch pot is the right home for a single mature rhizome.
Fabric grow bags are excellent for this crop. Their breathable side walls keep root temperature even and air the mix, and you can roll the sides down when you want to check moisture. Plastic nursery pots are cheaper and hold water longer, so you must be more disciplined about watering. Wine barrel planters work well if you have the space, since they hold 15 to 20 gallons and rarely need lifting.
Whatever you choose, check it by squeezing the sides. A container that flexes noticeably at the base may crack when a mature rhizome expands against it. Turmeric does break small plastic pots, and it does so quietly, at the bottom seam.
2. Prepare the Potting Mix
Mix 70 to 80 percent potting soil with 20 to 30 percent aged compost, then add roughly one part perlite per five parts of the base mix. The compost feeds the plant steadily; the perlite keeps water moving so the mix does not turn into a brick.
Turmeric prefers slightly acidic to neutral soil, roughly pH 5.5 to 7.0. Most bagged potting mixes sit in that range already, so a soil test is not worth the fuss for a single pot.
Fill the container to within an inch or two of the rim, water it once and let it drain fully before you plant. Filling a pot with dry mix and then watering it for the first time often leaves dry pockets around the rhizome, which is exactly where rot starts.
3. Plant the Turmeric Rhizome Correctly
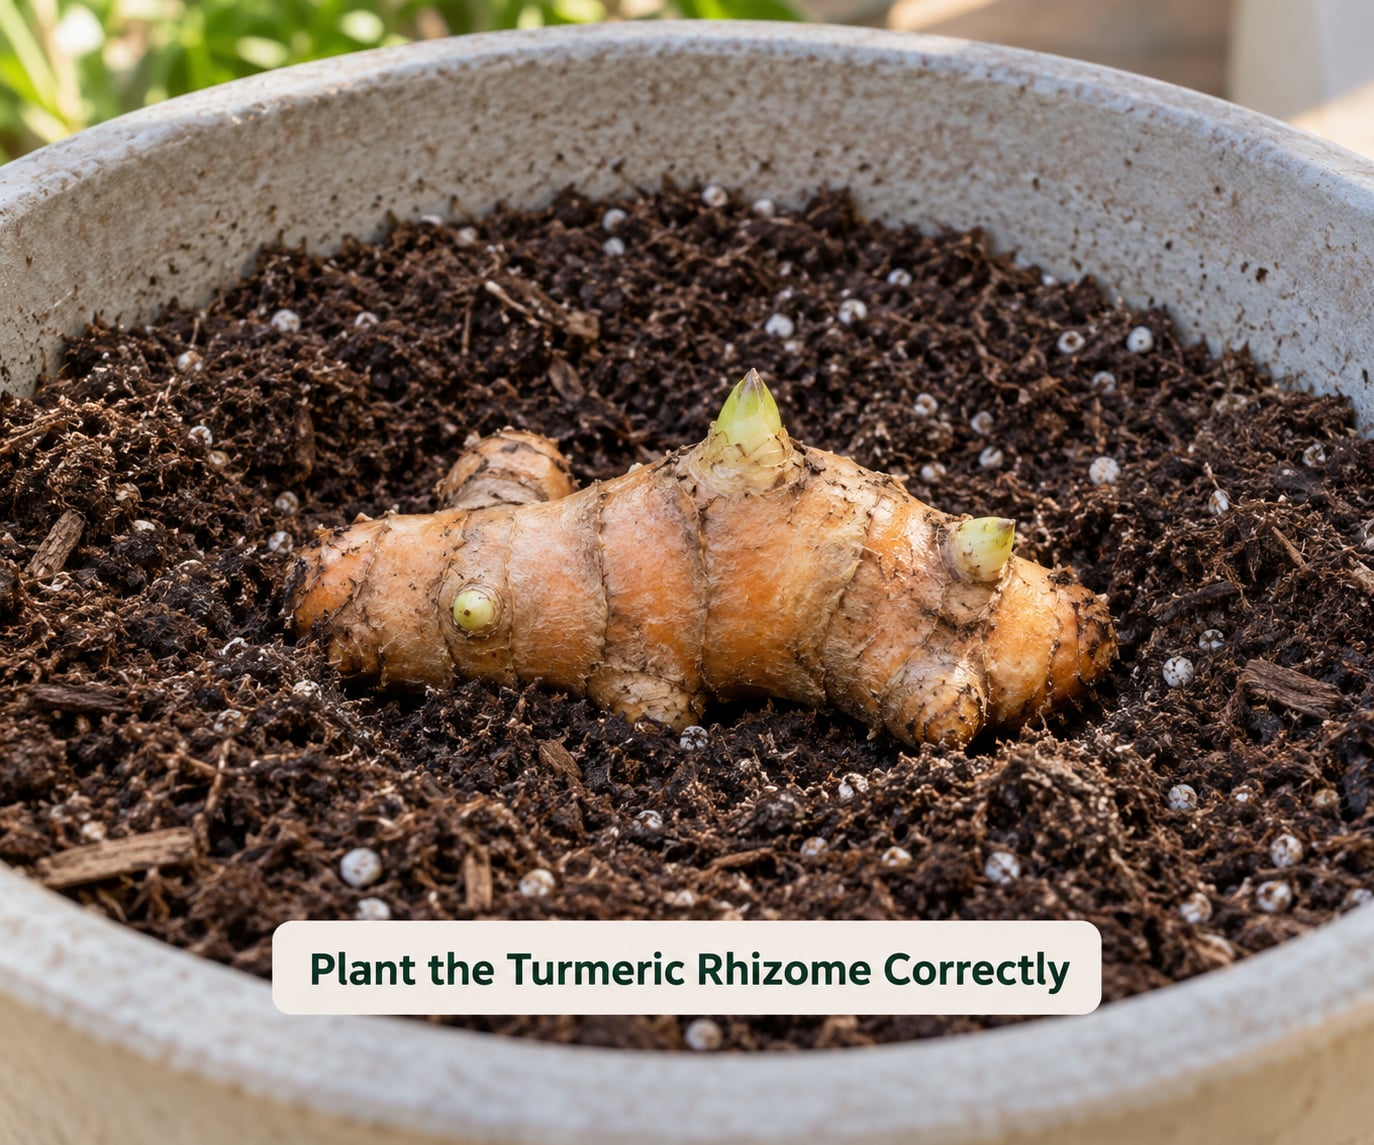
Start with the rhizome, and start it early. If the piece is larger than a walnut, cut it into 2 to 3 inch sections with two or three buds each, using a clean knife. Lay the cut pieces somewhere dry and airy for 3 to 7 days so the wounds scab over.
That scabbing step is the difference between a healthy sprouting piece and a rotting one. Cut surfaces are open wounds, and burying an unsealed wound in damp soil is an invitation to soil-borne rot. Some growers soak seed pieces for about 12 hours in plain water or a dilute hydrogen peroxide solution before planting, which wakes them up faster, but a long soak in plain water does the opposite and raises rot risk.
Pre-sprouting in moist coconut coir works well if you want faster results. Set the pieces in a shallow tray of damp coir, keep it around 75 to 80°F, cover loosely, and check every few days. Buds usually show in 2 to 4 weeks and can then be transplanted into their final pot.
Dig a hole 2 to 4 inches deep, set the piece on its side or flat with the buds angled upward, and space pieces 4 to 6 inches apart. Backfill gently, press the mix down just enough to make contact, and water once to settle it.
Do not bury emerging shoots. If you see a green tip pushing above the soil a week after planting, leave it alone. Later in the season you will want to hill up extra mix around the plant, because the new rhizomes form near the surface and pushing them down into the soil is not necessary for them to thicken.
Gardeners on Reddit regularly report that the piece they had almost thrown away sprouted at month three. That is normal. Keep watering the mix, not the calendar.
4. Water Lightly and Keep Conditions Warm
Keep the mix evenly moist, like a wrung-out sponge, for the whole season. Water when the top inch feels dry, then water thoroughly until you see runoff. In warm weather that may be every two days; in a cool windowsill it may be once a week.
Small pots swing between dry and saturated quickly. Check by weight rather than by calendar: lift the pot and compare it with how it felt yesterday. That is a far better guide than any schedule, and it works in every season.
Turmeric grows fastest between 65 and 90°F. Growth slows sharply below 50°F, and a hard frost kills the plant in hours, so containers in zones 7 and below need the pot indoors or in a greenhouse until the last frost has passed.
Outdoors, give the plant morning sun and afternoon shade. Above 90°F, direct afternoon sun scorches the leaf edges, and a 40 to 50 percent shade cloth fixes the problem cheaply.
Moving a plant outdoors needs a week of hardening off. Set the pot outside for an hour on day one, in the shade, and increase the exposure by an hour or two each day until it has handled a full day of direct sun.
5. Feed and Support the Growing Plant
Work a slow-release organic fertilizer into the top inch of mix at planting time, following the label rate. Do not double it, because rich soil pushes soft growth that the plant cannot support.
Once the first leaves are fully unfurled, start a monthly liquid feed of fish emulsion, seaweed extract, or a balanced organic fertilizer at half strength. Containers have no reservoir beyond what you put in them, so feeding is not optional for a plant you want to harvest.
Top-dress with a inch of compost when you hill up new rhizomes around month three or four. Keep the added mix light and compost-like; packing soil down around the stem invites rot at the crown.
Slow growth and leaf dieback are usually not a disease. Turmeric is a seasonal plant, and in a cool greenhouse it will sit nearly still for weeks at a time, then resume when the light returns. What matters is whether the soil is moist and the roots are white and firm.
Watch the undersides of leaves for spider mites in dry indoor air, and for aphids on the tender new shoots at the top of the plant. A rinse with a bottle sprayer clears light infestations, and insecticidal soap handles anything heavier. Rotate crops and replace old potting mix each season if you reuse the same pot, since turmeric pathogens persist.
6. Harvest Turmeric from the Container
Plan on 8 to 10 months from planting to harvest, which is longer than most people expect. The signal is the leaves. When they yellow, curl and begin to die back on their own, the rhizomes below have usually matured.
Stop watering one to two weeks before you harvest. The mix dries enough to make the job easier and cuts the risk of tearing the rhizomes apart.
There are two clean ways to lift them. Tip the whole pot on its side and sift the rhizomes out with your hands, which protects the branching hands and fingers, or slide a knife around the inside wall and lift the root mass in one piece, then break it apart over a tray.
Break off only what you need and keep the rest sound. Several fingers of an unspoiled hand make ideal seed for next season. Dust the pieces with a little cornmeal or dry sand and store them in a single layer in a cool, dark, dry spot, away from the refrigerator.
A partial harvest works if you need turmeric early. Snap off one or two outer fingers and leave the plant in the pot; it usually closes the wound and keeps growing. Fully lifted plants can be potted back up and will hold for a while in a bright window, though they usually decline.
Freshly lifted rhizomes keep two to four weeks in the fridge and several months if you dry them completely. Dry or dehydrate them for storage, which concentrates the flavor. Dry turmeric does not deliver the same curcumin as fresh, and curcumin itself is poorly absorbed on its own; black pepper and fat improve absorption, and anyone on blood-thinning medication or with gallbladder or kidney conditions should ask a doctor or pharmacist before using turmeric regularly or in concentrated form.
Common Mistakes and How to Fix Them
Most failed container turmeric crops come down to five things: the wrong seed, too much water, too little patience, a pot that is too small, and heat. Here is what each one looks like and what changes it.
- Nothing comes up after six weeks. Usually not a failure. Indoors, seed can take 3 to 8 weeks; outdoors in cool spring weather it can take 3 to 4 months. Check moisture, keep the pot warm, and wait. Keep watering on the mix, not the calendar, and never try to force growth with extra fertilizer.
- The rhizome goes soft and smells sour. Rot, almost always from over-watering or from planting an unsealed cut. Lift the piece, cut back to firm flesh with a clean knife, let it scab for several days, and replant in fresh, drier mix. Improve drainage with more perlite and a saucer that drains freely.
- Nothing sprouts at all after 8 to 10 weeks indoors. The piece was probably treated with a sprouting inhibitor or was already dead. Turmeric sold for cooking is frequently treated to extend shelf life, which is exactly why organic seed or dedicated seed rhizomes are worth the difference.
- Leaves yellow between watering. Check the mix with a finger two inches down. Dry means water thoroughly. Wet means cut back and check for rot at the crown. A plant that yellows after a cold snap outdoors is usually just stressed and will recover.
- Leaf edges turn crisp and brown in summer. Heat and wind. Give afternoon shade or a shade cloth, and check the pot twice daily on hot days.
- Rhizomes split the pot. The container was too small or the roots hit the sides. Tip the pot instead of pulling the plant, and move up to a 5 gallon or larger pot next season.
- Rhizomes never swell, only leaves grow. Almost always too little feeding in a closed pot, or a plant sitting below 50°F. Move it somewhere warmer and begin a monthly liquid feed.
- The plant dies in winter. Turmeric is a tropical perennial that goes dormant, not dies. In zones 8 and warmer, leave the pot outside and stop watering; in colder zones, bring it into a bright room, cut back on water, and let it rest until spring.
- Trying to grow turmeric in water. Ginger-family rhizomes rot in standing water far more often than they succeed. If you want hydroponics, the rhizome must be held above the nutrient solution in a net cup with the water line at the base, never submerged, and you need to change the water weekly. Most growers do better in soil.
One question comes up on gardening forums constantly: can ginger and turmeric share a pot? Yes, and they are happy together in the same soil, since they share the same warm, moist, well-drained conditions. Give each 6 inches of space in a pot at least 15 inches wide, plant them at the same depth, and expect both to slow together in cold weather. Keeping them in separate pots gives you finer control, because ginger tends to run wider and will crowd a turmeric plant sooner than the other way around.
Frequently Asked Questions
How long does it take to grow turmeric in a container?
Plan on 8 to 10 months from planting to harvest, which surprises most first-time growers. Sprouting is a separate clock and takes 3 to 8 weeks indoors or 3 to 4 months in cool outdoor spring weather. Harvest when the leaves yellow and begin to die back on their own, and stop watering one to two weeks before you lift the pot.
Can turmeric grow in a pot indoors?
Yes, and indoors is the standard method in USDA zones 7 and below. Give it a warm windowsill with at least six hours of light, or add a grow light that runs 12 to 14 hours a day. Keep temperatures between 65 and 90°F, use a pot with drainage holes and a saucer, and expect the plant to drop leaves as autumn light fades.
How big should a container be for turmeric?
Use a container at least 10 to 12 inches deep with drainage holes in the base. A 3 gallon pot is the practical minimum and holds one rhizome for a plant about 2 feet tall. A 5 to 10 gallon pot, 14 to 18 inches deep, fits two or three pieces and produces a bigger harvest. A single mature rhizome wants a pot close to 15 inches across.
Why are my turmeric leaves turning yellow?
The most common causes are over-watering, cold soil, and natural dieback at the end of the growing season. Push a finger two inches into the mix: if it is dry, water thoroughly, and if it is wet, let it dry and check the crown for rot. Yellowing after a cold night outdoors usually resolves on its own once conditions warm.
Do I need to use fertilizer when growing turmeric in containers?
Yes, because a container holds only what you put into it. Mix a slow-release organic fertilizer into the top inch at planting, following the label rate, then feed monthly with fish emulsion or seaweed extract at half strength once leaves are unfurled. Top-dress with compost around month three when you hill up soil over the forming rhizomes.
Can I regrow turmeric from a supermarket rhizome?
Sometimes, but it is a gamble. Cooking turmeric is often treated with a sprouting inhibitor to extend shelf life, and pieces that have been sitting in a cold case rarely sprout. Choose organic turmeric if you must use supermarket stock, pick firm pieces with 2 to 3 green or pale buds, cut and scab them for 3 to 7 days, and start several in case some fail.
Conclusion
Start with three decisions and the rest is maintenance. Pick a pot at least 10 to 12 inches deep with drainage holes, plant a firm seed rhizome with 2 to 3 buds 2 to 4 inches deep with those buds angled up, and keep the pot warm and the mix evenly moist rather than watering to a schedule.
Most people who give up on turmeric in containers do so during the quiet weeks before the first shoot appears. That wait is the crop. Give it the time, feed it monthly, and harvest eight to ten months later when the leaves tell you it is done.