To propagate herbs from cuttings, snip a healthy 4 to 6 inch stem just below a leaf node, strip the lower third of its leaves, and stand it in water or press it into moist potting mix in bright indirect light. That single cutting becomes an independent plant, usually faster and more reliably than starting from seed.
How to propagate herbs from cuttings works because the piece of stem still carries live cells at its nodes. Keep that stem hydrated, and those cells seal over into a callus and push out new roots. Soft green stems such as mint and basil usually show roots in 7 to 14 days. Woody stems such as rosemary, sage and thyme take a month or two and do far better in soil under a humidity cover than floating in a jar.
The work is cheap and takes about ten minutes of actual handling. The waiting is the part. Below is the sequence I use, including the step most guides skip: sanitising the scissors and hardening the roots before potting on.
One note before you start, because this site cares about it: many of the herbs people propagate are aromatic or medicinal. Rosemary, sage, thyme, oregano and lavender are rich in volatile oils, so take cuttings outdoors or in a well-ventilated space rather than over a food-prep surface, wash your hands afterwards, and keep cuttings from any plant treated with unlabelled sprays away from anything you plan to eat or brew.
Table of Contents
- 1What You Need
- 2Step-by-Step: How to Propagate Herbs from Cuttings
- 31. Choose a Healthy Parent Plant
- 42. Take Clean Stem Cuttings
- 53. Prepare the Cuttings
- 64. Place Cuttings in a Rooting Medium
- 75. Maintain Warmth and Humidity
- 86. Check for New Roots
- 97. Transplant Rooted Cuttings
- 10Common Mistakes
- 11Frequently Asked Questions
- 12What is the easiest herb to propagate from cuttings?
- 13Should herb cuttings be rooted in water or soil?
- 14How long do herb cuttings take to grow roots?
- 15Can I propagate rosemary and thyme from cuttings?
- 16Why are the leaves on my herb cuttings turning brown?
- 17When should I transplant rooted herb cuttings?
- 18Conclusion
What You Need
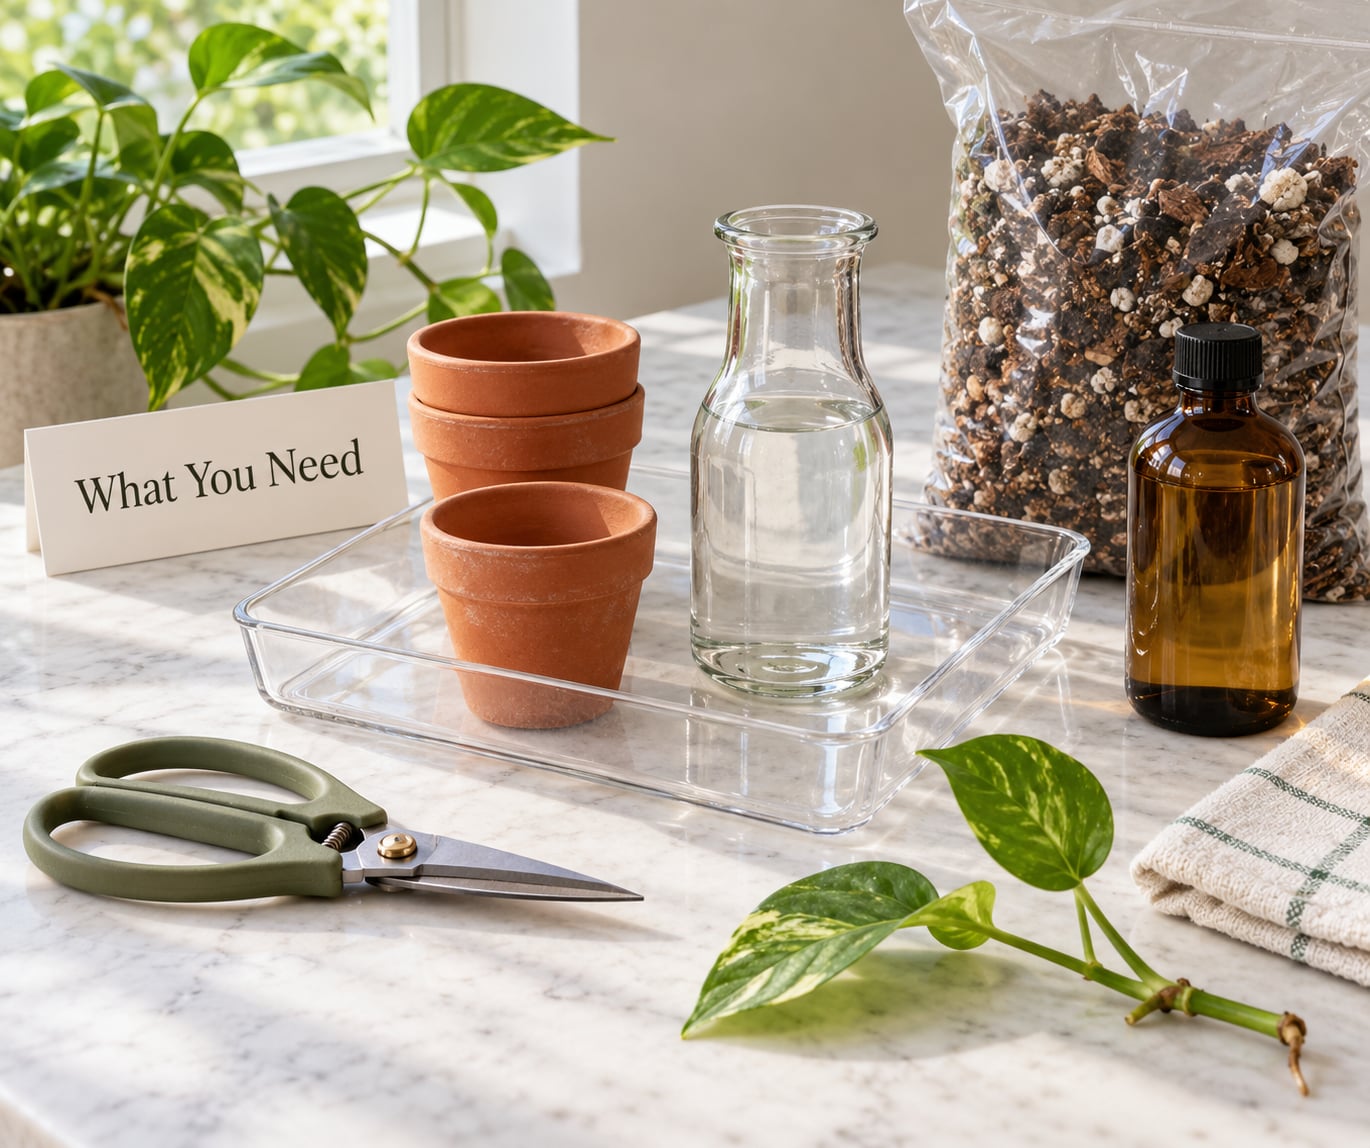
None of this is specialised equipment, and most of it you can substitute without losing much success rate.
- Sharp scissors or pruning shears. Bypass the office scissors, which crush the stem rather than cut it cleanly.
- Rubbing alcohol and a cotton pad. Wipe the blades before and after every plant.
- A chopstick or a dibber. Used to make a planting hole so the stem is not shoved sideways when you push it into the medium.
- A narrow-necked jar or bottle. The neck holds the cutting upright. A perforated spice shaker lid keeps leaves above the waterline.
- Filtered, spring or rested water. Let chlorinated tap water stand 24 hours. Skip distilled water, which has almost no trace minerals left for the cutting.
- Coarse sand or perlite mixed with potting mix. A 50/50 blend drains freely while holding enough damp for a base that has no roots yet.
- Small pots with drainage holes. Every pot. A container without a hole holds stagnant water and kills the cutting from the bottom up.
- Optional: rooting powder or ground cinnamon. Most useful on woody stems, where root initiation is the hard part.
- Optional: a clear plastic bag or cloche. Cheap humidity for the stubborn herbs.
Substitutions are easy. A yogurt cup with holes poked in the base works as a pot. A yogurt lid or a small dome makes a humidity cover. Perlite can be swapped for coarse builder’s sand, though play sand packs down and holds too much water.
Step-by-Step: How to Propagate Herbs from Cuttings
1. Choose a Healthy Parent Plant
Take cuttings from vigorous, actively growing stems. Young green tips carry the most live tissue and root fastest.
Avoid stems that are flowering or starting to bolt, old brown woody growth, anything discoloured or damaged, and anything crawling with aphids, whitefly or spider mites. A cutting from an infested plant carries the infestation straight into your jar and to every other plant you own, so check the leaf undersides before you cut. Rubbing the underside of a leaf between your fingers and looking for sticky residue is the fastest way to spot aphid colonies.
Morning is the best time, before heat has pulled water out of the plant, and because the plant is full rather than thirsty. Take three or four cuttings from the same stem while you are at it, so one failed cutting is not a failed experiment. Never strip more than a third of a single plant at one sitting.
Ask the plant’s owner before you cut. For a friend’s mint patch this is a formality, but some herbs sit in collections under plant patents or belong to species protected in their region, and propagation rights differ by country. Where you take a cutting from also matters for herbal work: plants of known, documented provenance are the ones worth drying or tincturing.
2. Take Clean Stem Cuttings
Wipe the scissor blades with rubbing alcohol first. A dirty blade moves bacteria and fungal spores from one plant into the wound of the next.
Cut 4 to 6 inches for soft stems and 6 to 10 inches for woody ones. Make the cut just below a leaf node, at roughly a 45 degree angle, so a maximum surface area sits against the medium and the stem base is not pressed flat against the base of the glass. A node is simply where leaves, buds or branches emerge; that is where new roots almost always start.
For rosemary, sage, thyme and marjoram, look for semi-ripe growth: green and bendable but firm at the base, not the fresh floppy tip and not last year’s brown wood. Success signal: the stem snaps cleanly rather than bending in half.
3. Prepare the Cuttings
Remove the leaves from the lower third to half of the stem. Any leaf left underwater rots, and that rot travels into the stem.
Leave two to four healthy leaves above the waterline on a soft stem. Those leaves feed the cutting through transpiration while it has no roots to draw water from, and a cutting with too much foliage dries out before it ever roots.
Trim off anything bruised or damaged. Dip the cut end in rooting powder, or into ground cinnamon, if you are working with a woody species. Use the powder sparingly; a thick coat can seal the stem and trap moisture at the wound.
4. Place Cuttings in a Rooting Medium
There are two main options, and how to propagate herbs from cuttings differs slightly between them.
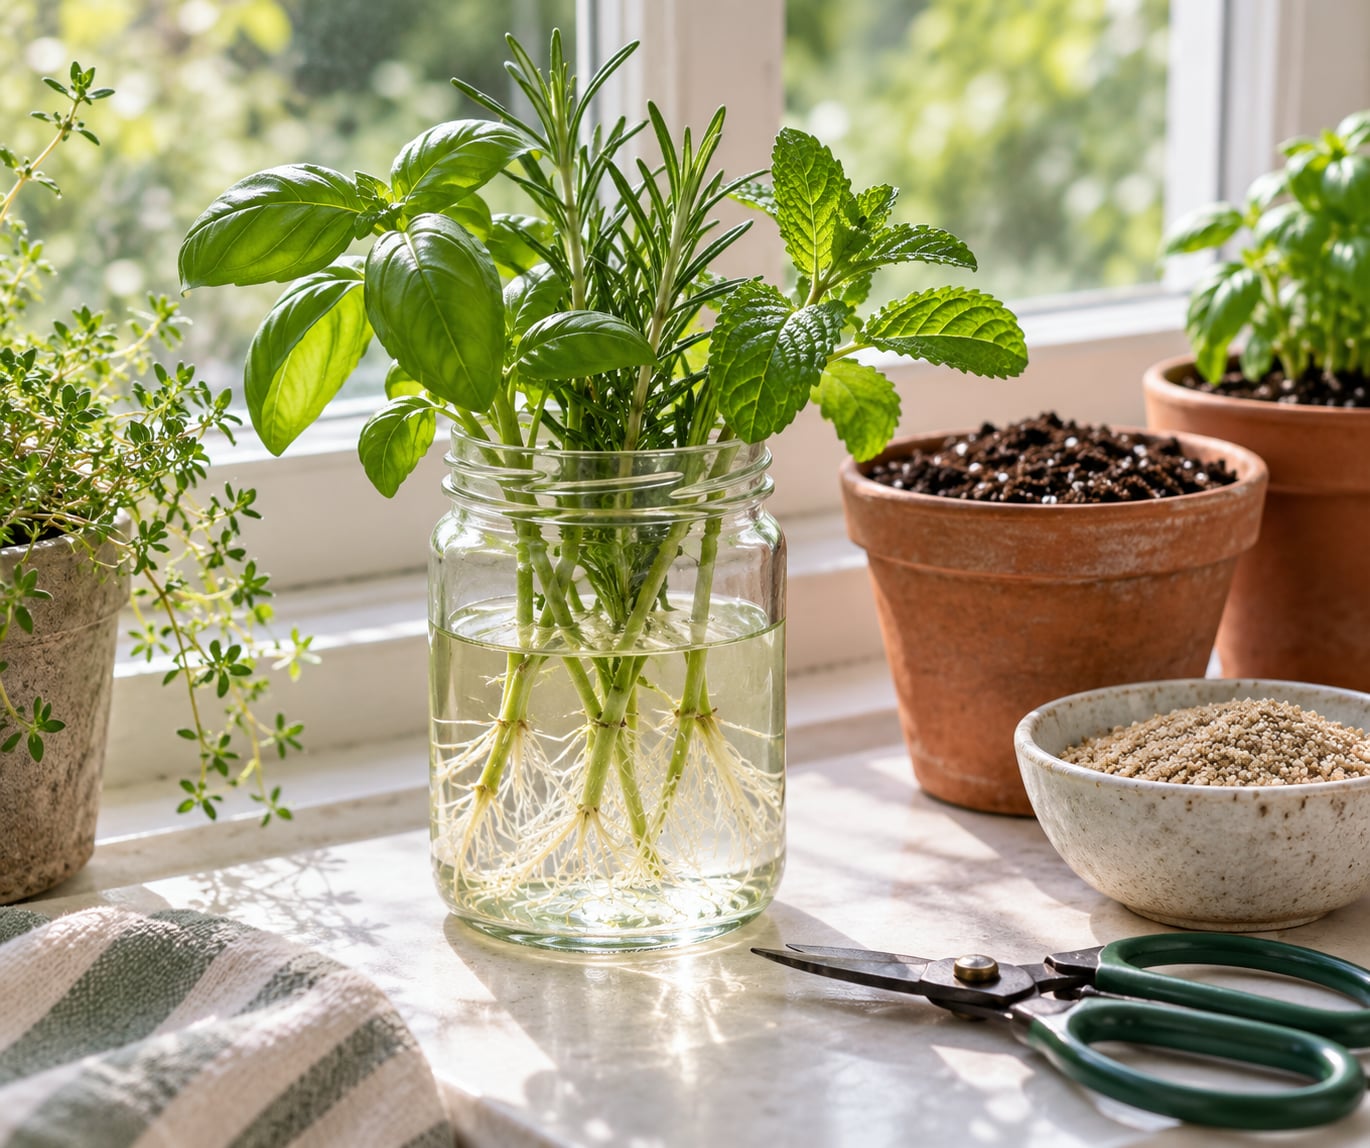
Water. Fill the jar with 1 to 2 inches of clean water and stand the cutting in it so only the bare stem sits below the waterline, nothing else. Amber or opaque glass slows algae; clear glass in a sunny window grows algae within days.
Soil or sand. Push a chopstick hole into the moist mix, insert the cutting, and firm the medium around it so the base sits just below the lowest node and the stem stands on its own. Burying any leaf is the same mistake as submerging one in water.
Success signal: the cutting does not move when you nudge the pot, and no leaf is touching the medium or sitting in the water.
5. Maintain Warmth and Humidity
Bright indirect light is the target. A cuttings jar on a bright windowsill works; a spot two feet back from a south window works better, because hours of gentle light beat an hour of scorching glass.
Change the water every 1 to 2 days, and fill it back up whenever the level drops below the stem. Rinse the glass at the same time; a film of algae on the inside will happily feed the rot you are trying to avoid.
For woody herbs, build a humidity cover. Put four sticks or chopsticks around the pot, drape a clear plastic bag over the top and tuck it around the rim, then keep the pot out of direct sun. Leave the bag closed for about a week, then vent it daily for an hour before removing it entirely around week three. Condensation running down the inside every day is too wet; a light mist is right.
Water the soil method whenever the top half-inch feels dry. Evenly moist, never waterlogged.
Signs of rot: the base of the stem turns dark and mushy, the water clouds within a day, or the whole cutting smells sour. Remove it immediately. Rot does not reverse.
6. Check for New Roots
Basil usually shows roots in 7 to 10 days, mint in 7 to 14, oregano and lemon balm in about two weeks. Rosemary, sage, thyme and lavender can take 6 to 8 weeks, and mine is not unusual.
Look for small white roots at the cut end, and for new leaves that are bigger or greener than the ones you left at the top. New growth means the cutting has restarted, even if you cannot see roots. Do not tug to test it. Instead, watch the water: when roots reach roughly 1 to 2 inches, they hold the stem upright on their own.
7. Transplant Rooted Cuttings
Pot on once you see four or five healthy roots or roots 1 to 2 inches long.
Harden water roots first, because this is where most new plants are lost. Over about a week, add a few pebbles at the water surface each day so the roots sit partly in air. The change forces them to thicken and develop root hairs instead of staying soft and fragile.
Then pot into a small container of draining potting mix, bury the stem to the lowest node, and keep it in bright light but out of hard direct sun for the first week. Feed nothing for a month. A cutting has no root system to handle fertiliser, and rich soil is an easy way to burn a plant that survived weeks to get rooted.
Once established, give it 4 to 6 hours of sun and let the top inch of soil dry between waterings. Wait 4 to 6 weeks of active growth before the first harvest, and never remove more than a third of the leaves at once.
Common Mistakes
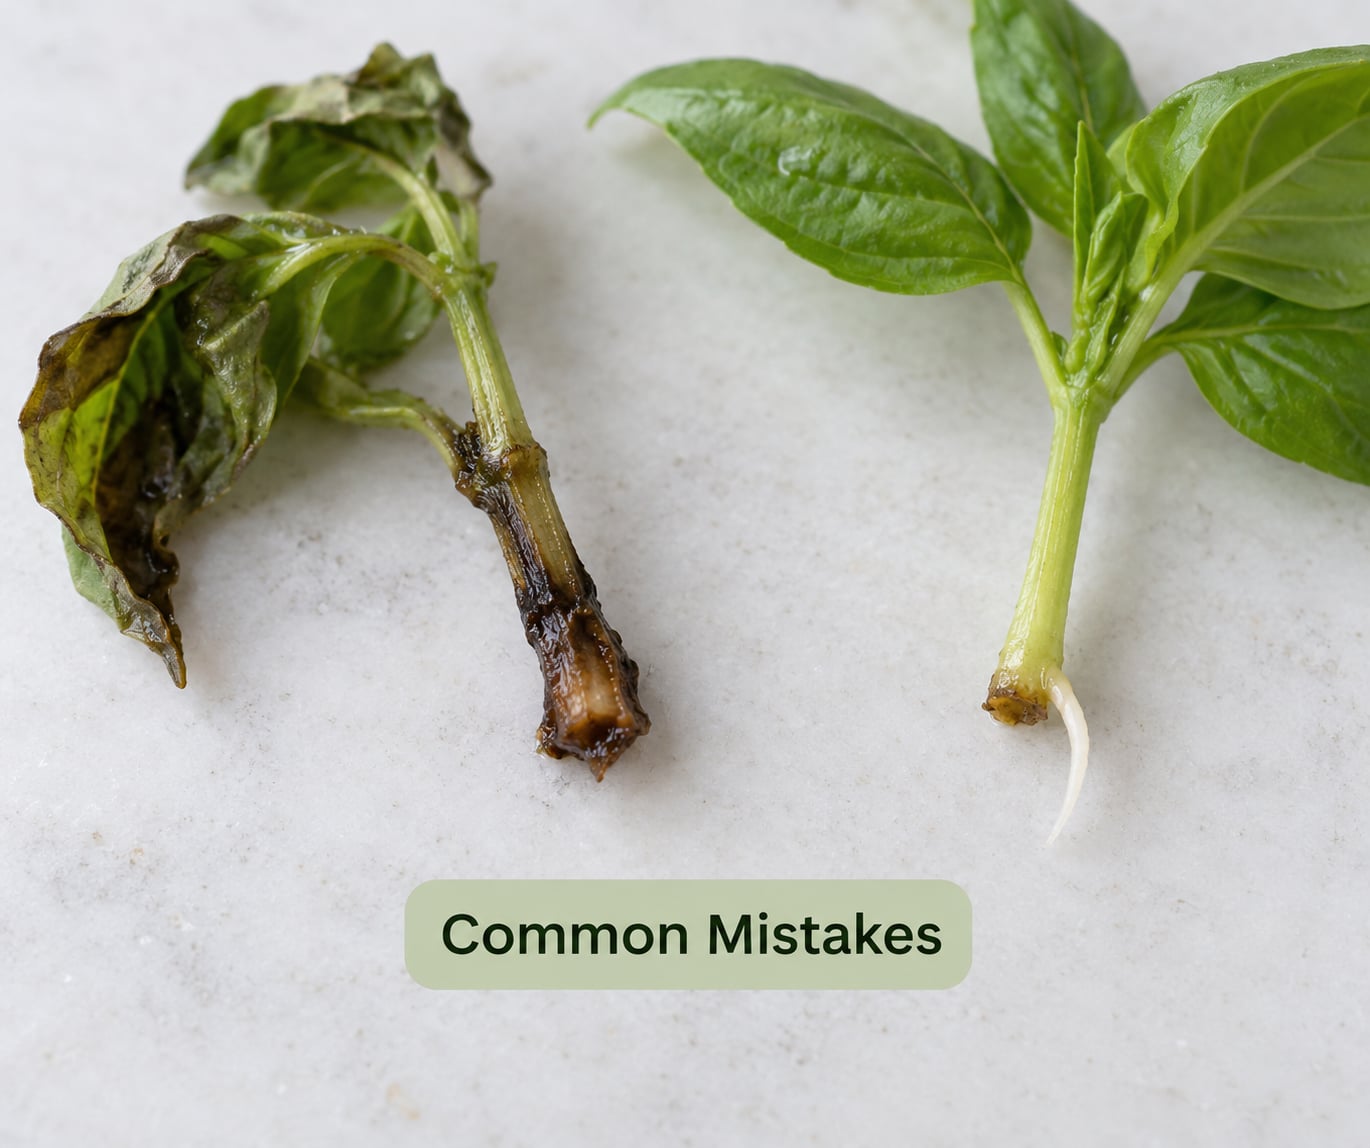
Almost every failed cutting comes down to one of five things.
- Old, woody or flowering stems. You see the cutting sit for weeks and never root. Fix: take semi-ripe green growth, 4 to 6 inches long, and never cut from a bolting plant.
- Submerged or buried leaves. You see mushy dark stem at the waterline and a sour smell. Fix: strip the lower third to half of the stem and keep every leaf above the medium.
- Overwatering or low light. You see cloudy water, algae, weak leggy growth. Fix: change water every 1 to 2 days, keep the medium barely moist and add brighter indirect light.
- Humidity too low. You see leaves crisp and brown at the edges, then drop. Fix: bag or cloche woody cuttings, or group pots together on a tray with pebbles and water.
- Moving too early. You see roots form, then collapse after potting on. Fix: wait for four or five roots, harden them for a week, then transplant.
Two smaller mistakes worth naming. Cutting from a grocery store herb that has been sitting for a week or more usually fails, because the stems have been cut and boxed long before they reached your kitchen; recut them at the base, expect a lower success rate, and check for mould at the stem. And variegated cultivars often revert to plain green when propagated from cuttings, so if the pattern matters to you, take cuttings from a plant you already know stayed true.
On aromatic and medicinal herbs specifically: work outdoors or in a ventilated room, keep cuttings off kitchen surfaces, and use clean pots and clean water. Anything you plan to dry, brew or tincture should come from plants you have grown without unlabelled sprays and can identify by name.
Frequently Asked Questions
What is the easiest herb to propagate from cuttings?
Mint, basil, oregano and lemon balm root readily from soft green stems, usually showing roots within 7 to 14 days in a plain jar of water. Mint in particular is very hard to fail with. Start there while you learn the routine, then move on to woody herbs such as rosemary and thyme, which want soil, humidity and considerably more patience.
Should herb cuttings be rooted in water or soil?
Water suits soft-stemmed herbs because you can watch roots appear and you cannot accidentally overwater it. Soil or coarse sand suits woody herbs and anyone who wants a stronger finished plant. Plenty of growers root in water first, then pot the cutting on once it has four or five roots, which gets you visibility plus a sturdier plant.
How long do herb cuttings take to grow roots?
Basil usually roots in 7 to 10 days and mint in 7 to 14. Oregano, sage and thyme take roughly three to five weeks, while rosemary, lavender and stevia can take 6 to 8 weeks. Plan on a month or two rather than days. If a soft-stem cutting has produced nothing after three weeks, discard it and start again with fresher growth.
Can I propagate rosemary and thyme from cuttings?
Yes, but not reliably in open water. Take semi-ripe green tips rather than mature brown stems, dip the cut end in rooting powder, insert into a free-draining mix of potting soil and coarse sand, and cover with a clear bag for humidity. Vent after about a week to prevent mould. Expect six to eight weeks and take several cuttings at once.
Why are the leaves on my herb cuttings turning brown?
Browning is usually water loss rather than rot. A cutting has no roots to draw moisture up, so dry air, harsh direct sun or a drying stem base causes it. Leaves dropping immediately after the cut mean the stem was too old or the parent plant was already stressed. Strip more of the lower leaves, move out of direct sun, and cover woody cuttings with a humidity cover.
When should I transplant rooted herb cuttings?
Move a cutting once it has four or five roots, or roots roughly 1 to 2 inches long, however long that took. Harden water roots first by adding pebbles at the surface over several days, so the water sits just below them and they toughen. Then pot into a small container with drainage and keep it out of hard sun for the first week.
Conclusion
Start with one pot of mint or basil in a jar of water on a bright windowsill. Snip 4 to 6 inches from a healthy stem, strip the lower third of the leaves, and change the water every day or two. Healthy stems plus steady humidity is the whole trick, and once you have rooted one soft herb, the woody ones stop being mysterious and start being a waiting game.