To harvest aloe gel safely, you cut a mature outer leaf from a confirmed Aloe vera plant, stand it cut-end down until the yellow latex has stopped draining, and only then fillet the rind away and collect the clear inner gel. The whole job takes about 30 minutes including drainage time, and it is beginner-level work with one sharp knife and a clean board. The single rule that matters most: nothing yellow comes anywhere near the gel.
Most guides get that rule roughly right and then move on. They rarely explain how to tell when drainage is actually finished, what to do if your plant might not be Aloe vera, or why your gel turned pink in the fridge overnight. Those are the details that turn a sloppy harvest into a clean one, so they get their own sections below.
A note on scope before we start. This is general information about preparing a plant, not medical advice. The evidence that fresh aloe gel outperforms simple cooling on a burn is modest, and anyone with a serious burn, an infection, or a reaction to aloe should see a clinician rather than a succulent. Aloe also causes contact dermatitis in a fair number of people, so patch-test any homemade gel on a small area first.
Table of Contents
- 1What You Need Before You Harvest Aloe Gel Safely
- 2Step-by-Step: How to Harvest Aloe Gel Safely
- 31. Confirm the Plant and Leaf Are Safe
- 42. Wash Your Hands and Tools
- 53. Remove a Mature Outer Leaf
- 64. Trim and Wash the Leaf
- 75. Cut the Leaf Lengthwise and Remove the Edges
- 86. Separate the Clear Gel from Yellow Latex
- 97. Collect and Store the Gel
- 10Storage and How Long Harvested Gel Keeps
- 11Harvesting Without Harming the Plant
- 12Who Should Not Use Harvested Gel
- 13Common Mistakes
- 14Frequently Asked Questions
- 15Can I harvest aloe gel from a young aloe plant?
- 16Is yellow aloe latex the same as clear aloe gel?
- 17How long can freshly harvested aloe gel stay in the refrigerator?
- 18Can I use homemade aloe gel on a burn, wound or irritated skin?
- 19How do I tell whether harvested aloe gel has gone bad?
- 20What type of aloe plant is commonly used for gel harvesting?
- 21Conclusion
What You Need Before You Harvest Aloe Gel Safely
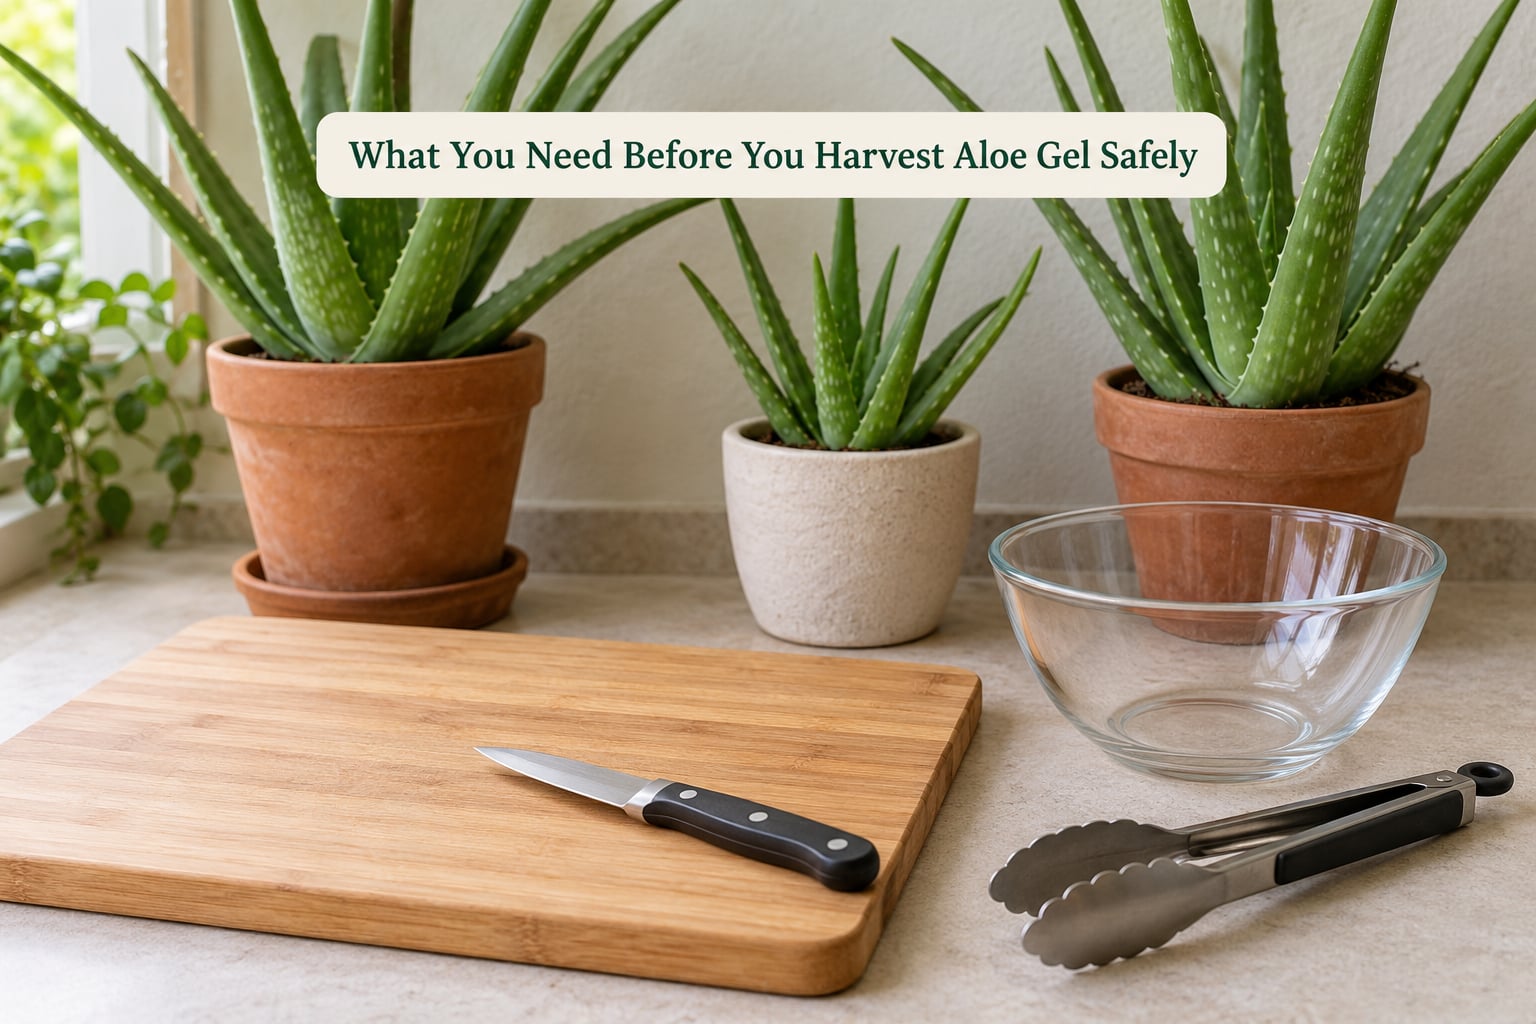
Six items, and three of them you probably already own.
- A sharp paring knife. A dull blade crushes the leaf and tears the gel rather than releasing it cleanly. A small chef’s knife works too, but a paring knife gives you more control near the base where the latex concentrates.
- A cutting board with a non-slip base. Put a damp towel under it. A fresh aloe leaf is one of the slipperiest things you will ever try to hold.
- Vegetable tongs. They keep your hands away from the spines along the serrated edges and out of the gel itself.
- A food-safe bowl or container, ideally glass, for the finished gel.
- A vegetable peeler, optional but genuinely safer than a knife for lifting the thin green rind.
- Clean water and a small sieve or colander for rinsing.
Before any of that, confirm the plant itself. The species sold as a houseplant aloe is not always the one used for gel, and the ornamental ones have a different chemistry. Aloe vera, also sold as Barbados aloe or the true aloe, has thick upright grey-green leaves with soft rounded teeth. Tiger aloe, Aloe aristata, and Aloe haworthioides grow as small rosettes of thin, spotted leaves. Aloe vera is a succulent, so if your plant has thin papery leaves in a tight rosette, treat the gel as ornamental only.
Skip any plant that was treated with a pesticide you cannot identify, that has been sitting in a chemically treated pot, or that shows rot, blackened tissue, or white fuzz at the base. There is no way to rinse those problems out of the gel afterwards.
Step-by-Step: How to Harvest Aloe Gel Safely
1. Confirm the Plant and Leaf Are Safe
Identify the plant as a mature Aloe vera, then choose one healthy outer leaf. Good harvest-ready leaves sit in the outermost ring, are firm and upright, and run roughly 8 inches (20 cm) or longer. You will see a faint darker mottling, which is normal.
Skip any leaf that is floppy, thin, yellowing, browned at the tip, or soft near the base. Never take from the crown, the tight cluster of new growth at the centre. Cutting there sets the plant back badly and can end the rosette for the season.
How to tell it worked: the leaf comes away with a firm, meaty resistance rather than bending like a loose strap of skin.
2. Wash Your Hands and Tools
Wash your hands with soap and water and dry them fully. Rinse the knife, peeler and board, and let the surfaces dry rather than cutting into a wet slick. Water is only a rinse here; a cutting surface that is merely damp is still a contaminated surface.
Wipe the outer surface of the leaf too, even if the plant is a windowsill specimen. Potting soil carries whatever was in it, and residue from a humidifier or a misting routine settles on the leaves.
How to tell it worked: your hands and every tool surface look clean and dry, with no droplets beading on the board.
3. Remove a Mature Outer Leaf
Hold the leaf low with the tongs and slice through its base where it meets the stem, angling the blade slightly downward. Take enough of the base that you sever the whole leaf rather than tearing it, which leaves a ragged stub that can rot into the crown.
As you lift the leaf away, keep the cut end pointed downward. That single habit stops soil from the pot from riding up onto the clean inner surface you are about to expose.
How to tell it worked: you get a single clean cut at the base, and the plant keeps its rosette shape and upright growth point intact.
4. Trim and Wash the Leaf
Set the leaf on the board and trim the serrated edges and any spines with the paring knife, cutting slightly away from your fingers. Discard a leaf that is more than a third damaged, spotted, or soft in any section. Rot hides in the middle, not just at the tip.
Rinse the whole leaf under cool running water, then pat it dry with a clean towel. Cut it into manageable 4 to 6 inch lengths so the pieces fit flat on the board.
How to tell it worked: the pieces lie flat without springing open, and no sand, fuzz, or grit remains on the skin.
5. Cut the Leaf Lengthwise and Remove the Edges
Stand the leaf upright and slice it lengthwise down the middle with the knife, cutting away from your body. Some leaves resist a straight cut, so instead lay the piece flat, slice off the top third, and slide the blade between the green rind and the clear flesh underneath.
Set the opened halves cut-side down on the board. Pull off any remaining spiny teeth and trim away the green outer layer, taking a thin margin of clear flesh with the peeler if that is easier to control than the knife.
How to tell it worked: the flesh is translucent and glossy, with no green film and no yellow tint on the exposed surface.
6. Separate the Clear Gel from Yellow Latex
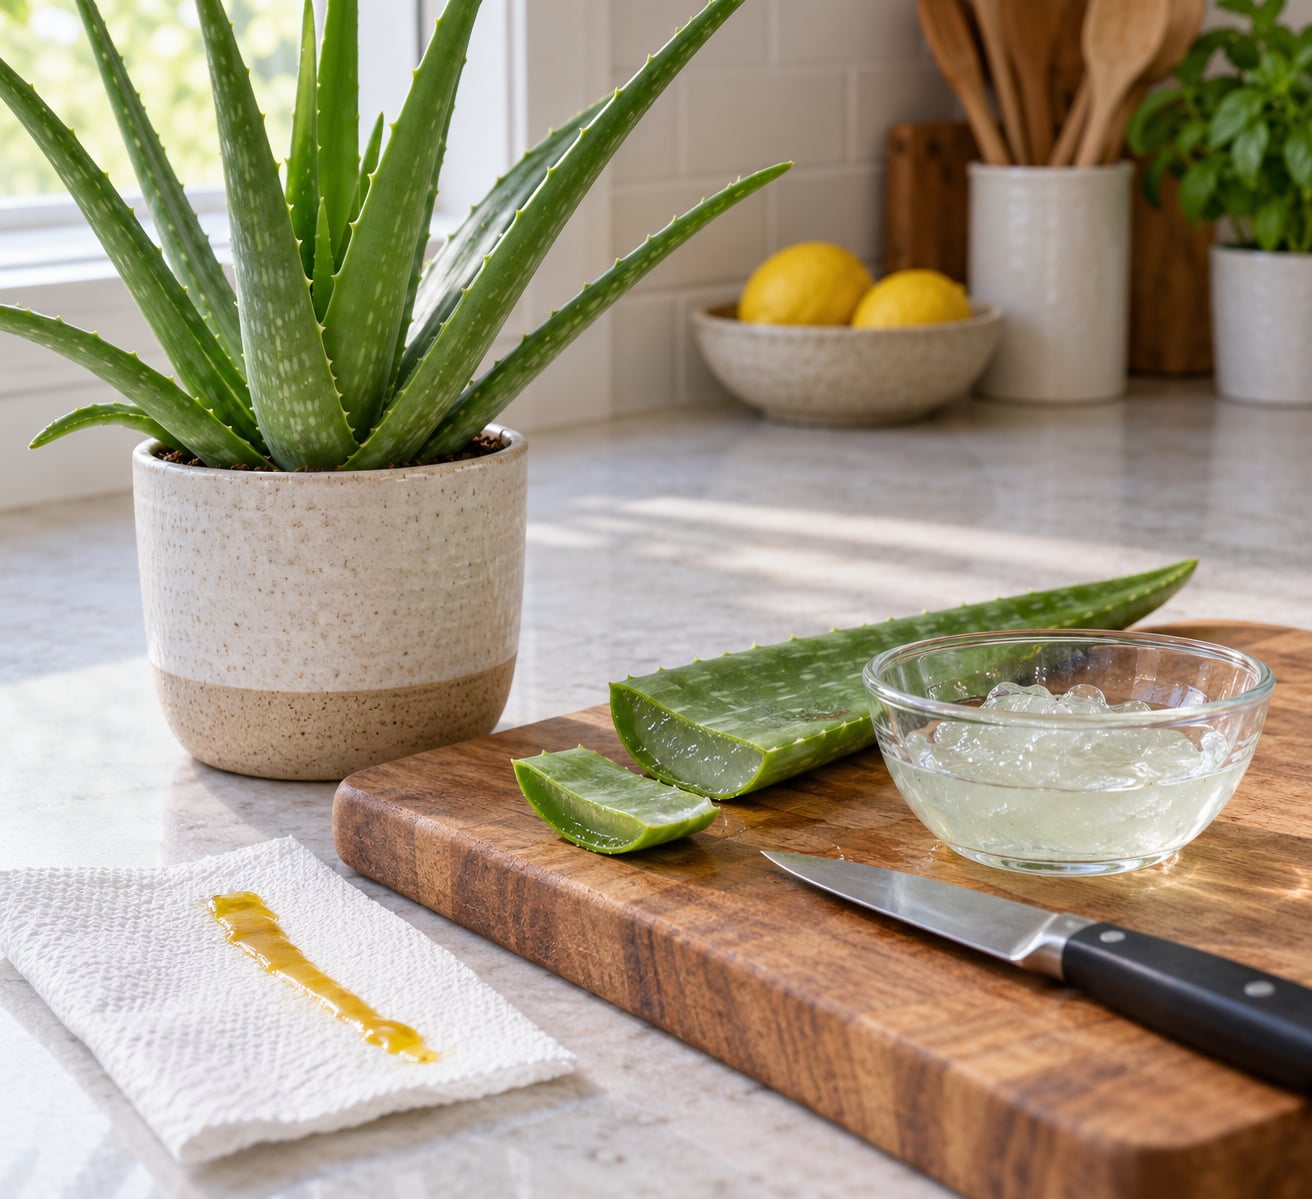
This is the step that decides whether the harvest is safe. Aloe latex, also called aloin, is the bitter yellow sap that sits directly beneath the rind and pools in the base and the leaf margins. Clear gel is the slippery inner tissue you actually want.
Gather the yellow fluid you can see with a spoon and blot it away with a paper towel. Then stand the opened leaf pieces cut-end down in a cup or on a sloped board and leave them for 10 to 20 minutes until the flow slows to an occasional seep. Rinse the cut surfaces and repeat once more.
How do you know draining is finished? Run a clean knife blade down the inner surface near the base. When the blade comes away clean or shows only clear moisture, the latex has gone. If it picks up a yellow or olive film, you are not finished. Keep going. Anecdotal reports from home growers on Reddit’s r/aloe and other gardening groups make the same point about a rubbery, faintly bitter coating as a reliable late-stage sign.
Peer-reviewed safety literature is unambiguous about why this matters. A review in the peer-reviewed PMC toxicology archive associates ingested aloe preparations with diarrhea, low potassium, melanosis coli, and kidney failure in serious cases, and aloe latex is also a known skin irritant. Discard every drop of yellow material rather than trying to salvage the leaf around it.
7. Collect and Store the Gel
Lift the clear gel out of the rind with a spoon or your fingers, scraping the inner membrane as you go, and drop it straight into your clean container. Rinse the collected gel two or three times in a sieve under cool water to lift off any remaining latex film, then spread it out and look it over.
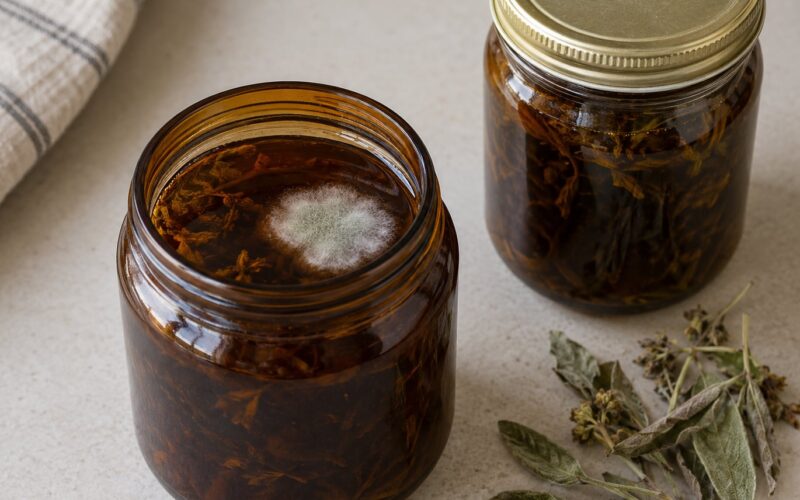
Discard the batch if you see green flecks, a slimy watery film, an off colour, or an unusual smell. Gel is normally clear to pale yellow-green with a faint, fresh scent. Note that absence of an off smell or colour does not prove safety, since spoilage in fresh plant tissue is not always visible. Keep the container open only for the moment you need to fill it, then close it.
How to tell it worked: the gel looks glossy and clear in a sealed glass container, with no yellow film, and it is in the refrigerator within an hour.
Storage and How Long Harvested Gel Keeps
Storage time is the variable people get most wrong. A whole leaf wrapped in cling film and kept cold can hold for a week or two, and many home growers keep whole cut leaves and process pieces as they need them rather than doing the whole leaf at once. Gel that has already been filleted and cubed has more exposed surface area and should be used quickly, within a few days. Pureed gel for topical use is commonly treated as good for about a week refrigerated.
Freezing works and is the simplest way to keep a large harvest. Spoon the gel into an ice cube tray, freeze it solid, and move the cubes to a sealed bag. Frozen gel loses some of its slip, which makes it less pleasant on skin, but for recipes and soap making it is fine.
Nobody has measured the shelf life of home-harvested gel, so treat these as conservative windows rather than guarantees. If a batch smells off, looks discoloured, or has gone thin and watery, throw it out. A little extra care about chilling is far cheaper than a stomach upset.
Harvesting Without Harming the Plant
Leaves you remove do not grow back on that same plant, but the plant compensates by pushing out new leaves from the crown. Keep to two or three leaves per harvest, take them from alternating sides of the outer ring, and let the plant produce a fresh set before you cut again. On a healthy potted specimen, that usually means a harvest roughly twice a year at most.
Soil matters more than people expect. A plant that has been overwatered produces watery, weaker gel, and a stressed plant may brown at the cut site. Bright indirect light, a pot with real drainage, and letting the top inch of soil dry out between waterings gives you a plant worth harvesting from.
Who Should Not Use Harvested Gel
Skip homemade gel entirely, or ask a doctor or pharmacist first, if any of these apply to you.
- Pregnancy. The latex component of aloe is a stimulant laxative, and laxatives are generally avoided during pregnancy.
- Children and infants. There is no well-established safe dose for homemade gel, and dosing by eye is not possible.
- Kidney disease or a history of electrolyte problems. Aloe-associated potassium loss is a documented concern, and the serious kidney outcomes in the toxicology literature are a reason for caution, not reassurance.
- Diabetes medication. Aloe may affect blood sugar, and combining it with glucose-lowering drugs can push levels lower than you want.
- Laxatives and oral aloe products. Do not layer homemade latex-contaminated gel on top of an existing aloe laxative.
- A known aloe or latex allergy. Contact dermatitis and more serious hypersensitivity reactions are both documented.
On the oral question specifically: commercially sold inner-leaf aloe juice is a processed product made for consumption, and homemade gel is not the same thing. Guidance from the National Center for Complementary and Integrative Health notes that aloe taken by mouth can have strong effects and advises talking to a healthcare provider before using it. If you want aloe for drinking or cooking, buy a product labelled for ingestion and check that it is inner-leaf, not whole-leaf, juice.
Common Mistakes
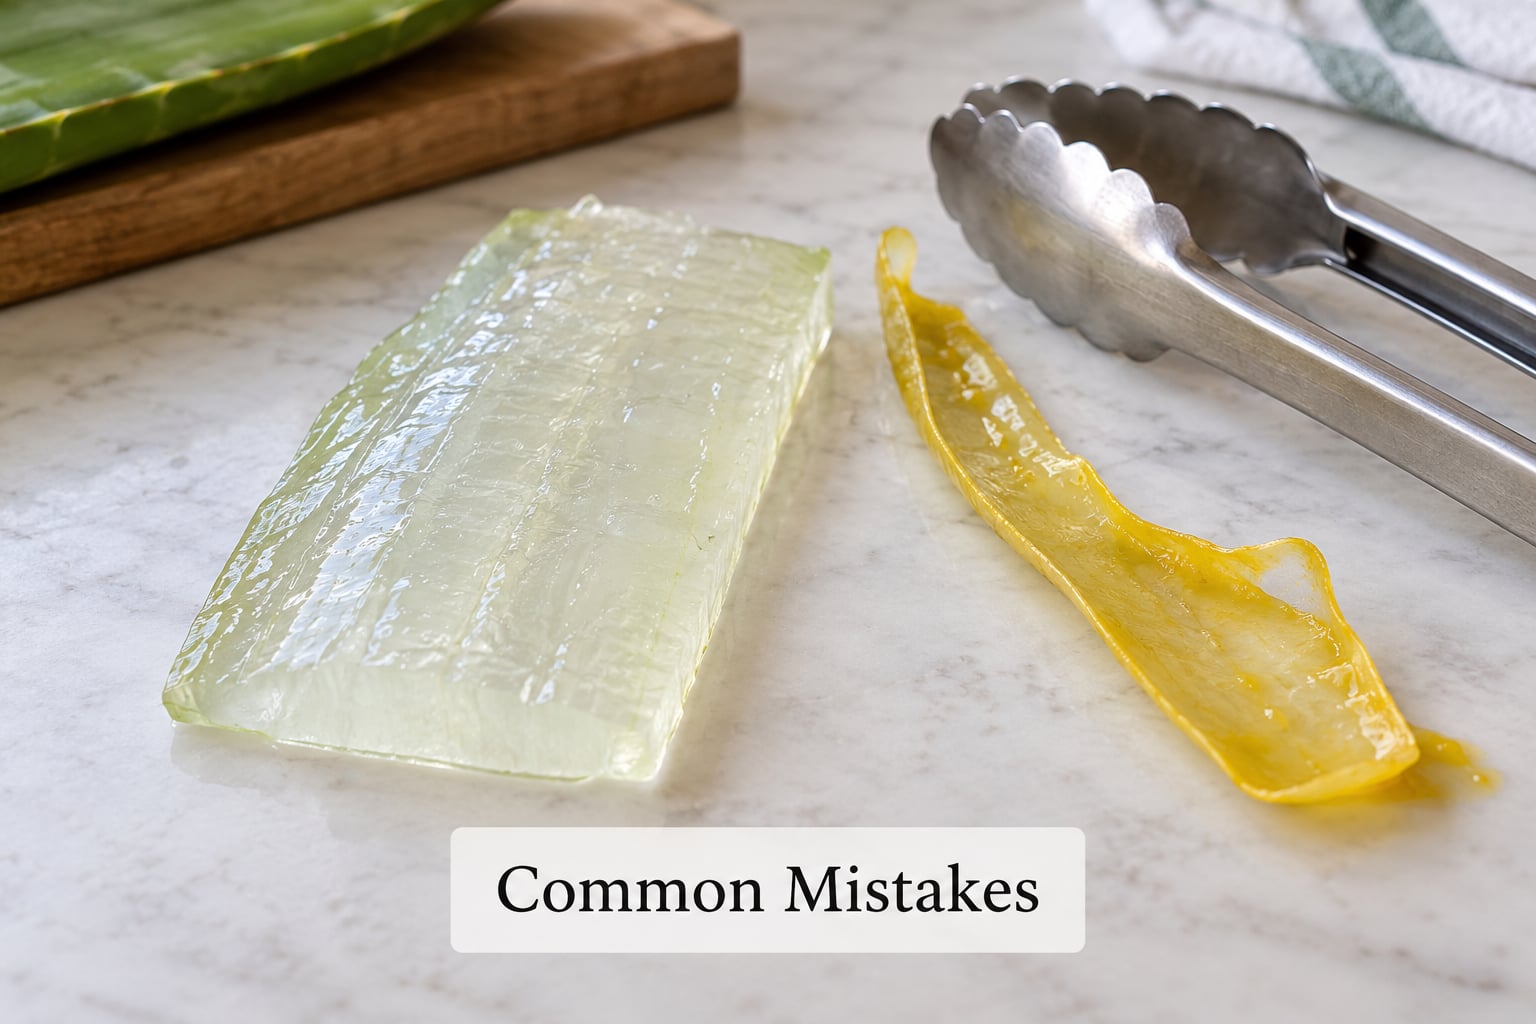
Nearly every bad harvest traces back to one of these.
Harvesting from a young plant. Immature leaves are small, watery and low in gel, and taking them stalls the plant. Wait until the outer leaves run about 8 inches and the plant has a full rosette.
Assuming every aloe is Aloe vera. Growers frequently harvest from ornamental species they cannot name. If the plant label is missing and the leaves are thin, spotted or rosette-forming, do not eat the gel and be cautious even for skin use.
Leaving yellow latex in the gel. Ten minutes is a starting point, not a finish line. Test the cut surface with a clean blade and keep draining until it comes away clear.
Cutting on a dirty or wet surface. A damp board is not a clean board. Wash, dry, and work on a towel-backed board so the leaf cannot skate.
Rinsing leaves in suspect water. Standing water from a flower vase or an unfiltered tap can carry contaminants into the cut tissue. Use cold running water and skip any leaf that has been misted with a pesticide or fungicide you cannot identify.
Treating fresh gel as a proven burn treatment. Cool running water is the first aid standard for a minor burn. Aloe may soothe on top of that, but it is not a substitute for medical care, and it can make a reaction worse.
One more that deserves its own line. Pink, red or brown gel is a live question in home aloe groups and nobody answers it well: a pink flush can come from light exposure, oxidation, or pigment in older leaves, but it can also mark spoilage. When the colour appeared after storage and came with an odd smell or a slimy texture, discard the batch. When it appeared on a slice right off a healthy plant and smells normal, it is most likely pigment. When you cannot tell which case you have, discard it.
Frequently Asked Questions
Can I harvest aloe gel from a young aloe plant?
Not really. Young leaves are thin and watery, yield very little gel, and taking them slows the plant’s development considerably. Wait until the plant has a full rosette and the outer leaves are roughly 8 inches (20 cm) long, firm and upright. That usually takes at least a year from a small starter plant. Harvesting two or three outer leaves from a mature specimen is safe for the plant; harvesting from the crown is not.
Is yellow aloe latex the same as clear aloe gel?
No, and they behave very differently. Clear gel is the translucent inner tissue of the leaf. Yellow latex, also called aloin, sits directly under the rind and pools at the base and along the margins. It is intensely bitter, irritating to skin, and a strong stimulant laxative if swallowed. Ingested aloe preparations are linked in the medical literature to diarrhea, low potassium and, in serious cases, kidney failure, so you drain it away and discard it.
How long can freshly harvested aloe gel stay in the refrigerator?
Treat a few days as the practical limit for filleted gel and about a week for pureed topical gel, kept in a sealed glass container. A whole uncut leaf wrapped in cling film keeps longer, often a week or two, and many growers process it piece by piece as they need it. Freezing in ice cube trays stretches a big harvest over months, at the cost of some slip. Home-harvested gel has never been formally shelf-life tested, so discard anything that smells off or looks slimy.
Can I use homemade aloe gel on a burn, wound or irritated skin?
For an intact minor sunburn, fresh gel is a reasonable cooling layer over cool water, but the evidence that it beats plain cooling is modest. Do not apply it to an open wound, blistered or infected skin, or anything that needs stitches, and do not use it instead of medical care. Aloe also causes contact dermatitis in a number of people, so patch-test a small area first. Ask a doctor or pharmacist for advice on anything deeper than a superficial sunburn.
How do I tell whether harvested aloe gel has gone bad?
Look for a cloudy or slimy watery film, an unusual colour, and an off smell, and discard the whole batch if any of them appear. Beware that fresh plant tissue can spoil without looking obviously wrong, so absence of these signs is not proof of safety. One practical tip is to keep the batch in a clear glass container, where any separation or cloudiness shows up against a plain background instead of hiding in a cloudy plastic tub.
What type of aloe plant is commonly used for gel harvesting?
Aloe vera, sometimes sold as the true aloe or Barbados aloe. It has thick upright grey-green leaves with soft rounded teeth and gets tall enough for its outer leaves to reach harvest size. The decorative aloes sold for windowsills, such as Aloe aristata or Aloe haworthioides, grow as small rosettes of thinner leaves and are not the same plant. If your pot has no label, confirm the identification before you plan to ingest anything.
Conclusion
Start by confirming you actually have a mature Aloe vera, since a misidentified ornamental aloe undermines everything after it. Set up a clean, dry workspace with a sharp blade, take one healthy outer leaf from the ring of mature growth, and hold the cut end down for 10 to 20 minutes. Test the cut surface with a clean knife until nothing yellow comes away. That is how to harvest aloe gel safely, and if you remember only one step, make it the drainage.