You can only harvest roots without killing the plant if the plant grows fibrous roots, a rhizome, or adventitious roots that can regrow. A plant with a single taproot, a bulb, or a corm usually dies when you dig it up, so the method that works for one species will not work for the next. Learning how to harvest roots without killing the plant starts with identifying the root type, taking a small piece rather than the whole plant, and putting the crown back in the ground.
I have seen the same disappointment more than once in gardens and on small holdings: someone digs a clump of a perennial that grew beautifully last year, takes the root, and the plant never comes back. The issue is rarely effort. It is that the taproot, the crown, or the whole mass of feeder roots went into the basket when only an outer root needed to come out.
This guide walks through the whole sequence, from checking whether you are allowed to harvest at all, to the digging technique, to the replanting and aftercare that most guides skip. The subject here is roots of herbaceous perennials, medicinal root crops and plants growing in the wild. It does not cover mushroom, lichen or bark identification, and it is not a substitute for local knowledge from the people who have harvested these plants for generations.
Table of Contents
- 1What You Need
- 2How to Harvest Roots Without Killing the Plant Safely
- 3Step 1: Identify the Plant and Check Whether It May Be Harvested
- 4Step 2: Confirm Permission and Assess Plant Health
- 5Step 3: Plan a Small, Selective Harvest
- 6Step 4: Loosen the Soil Without Cutting the Root
- 7Step 5: Remove Only the Needed Portion
- 8Step 6: Replant, Backfill, and Check Recovery
- 9Common Mistakes
- 10Frequently Asked Questions
- 11Does harvesting roots always kill the plant?
- 12Will a plant grow back if I cut its root?
- 13When is the best time to harvest roots?
- 14How much of the root system can I remove without killing the plant?
- 15Can a plant survive being moved if you dig it up?
- 16How do you know whether a species is legally protected?
- 17Conclusion
What You Need
Most of the kit for a careful root harvest is cheap and some of it you already own. What you cannot improvise is identification and permission.
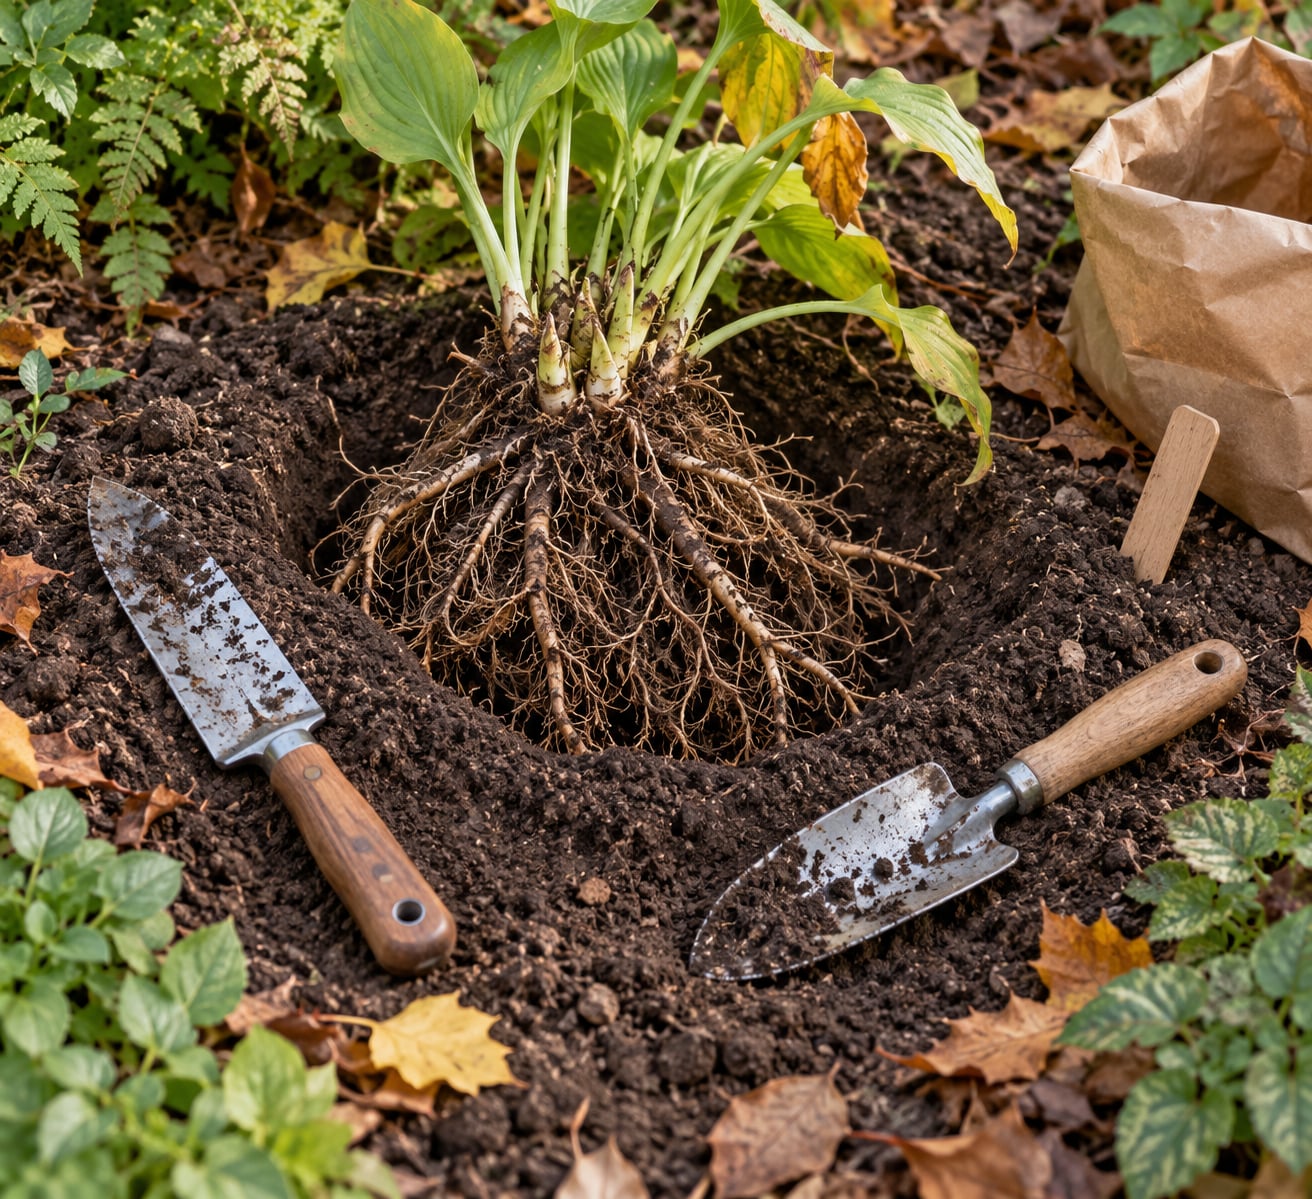
A hori hori knife is the single most useful tool. The narrow, slightly curved blade reaches into a hole without chopping the roots you were trying to keep, and the wooden handle gives you a way to lever the plant upward. A digging stick — a sharpened length of hardwood — works just as well in friable soil and is gentler on soil structure than any metal blade.
Also worth having: a hand fork or narrow trowel for working from the outer edge, a sharp knife with a clean blade for separating a root section, gloves because some species irritate skin, a water bottle for dry soil, a paper bag or open basket to carry roots in rather than a sealed plastic bag that traps moisture, a plant tag or collection label to record species, date and site, and a small amount of wood ash to rub onto any cut you make on the part of the plant that stays behind.
Before any of that, you need a reliable identification resource — a regional flora, a herbarium, or a local botanist — and the landowner or land manager’s permission. If the plant grows on protected land, inside a reserve, or on land you do not have the right to enter, you also need whatever permit or written authorization that land manager requires. Check the conservation status of the species with United Plant Savers or your regional conservation body before you lift anything.
How to Harvest Roots Without Killing the Plant Safely
The whole method rests on one rule: leave the plant able to feed itself. A plant survives partial root loss only when what remains underground can still supply water and nutrients, and when the root crown — the point where the stem meets the root system, and where the growing point sits — is undamaged and in contact with soil again.
That is why the type of root decides everything. A taproot is a single thick, storage-bearing root driven straight down, and a plant that depends on it cannot be saved once it is removed. A fibrous root system is a spreading mass of fine feeder roots with no single point of failure, which is exactly why grasses and many garden perennials tolerate partial harvest. A rhizome is a horizontal underground stem that sends up new shoots along its length. Adventitious roots are roots that form from a stem or leaf rather than from the seed root, and plants that make them can regenerate from a cutting that includes a piece of stem.
Before the technique, here is the classification that decides what you can take.
| Root type | Can the plant survive a partial harvest? | What to take | What to leave in the ground |
|---|---|---|---|
| Taproot (dandelion, burdock, many first-year biennials) | No, not reliably | Nothing, or a thin slice of one root only when the population is large and you are replanting the crown | Everything: the taproot, the crown, the crown bud |
| Fibrous root system (grasses, many garden perennials, most mature clumps) | Yes, within limits | Outer or lateral roots near the surface, no more than a third | The root crown and at least two-thirds of the root mass |
| Rhizome (ginger, turmeric, some sedges and iris) | Yes, usually | A section of rhizome, ideally with a growth point, if you are propagating or reducing a clump | At least two-thirds of the rhizome mass and its growing points |
| Bulb or corm (onion family, wild leek, crocus) | No | Nothing if the plant is to stay in the ground | The entire bulb and basal plate |
| Adventitious-rooted plant (easily rooted stems, succulents, string-of-hearts) | Yes, often tolerant of heavy loss | Most of the root mass if the plant is being repotted or divided | Enough root and all of the stem above the nodes |
One more term matters here. Girdling means removing a complete ring of living tissue around a stem, root or trunk. That is how a tree is killed by bark stripping, and it is how a perennial is killed by cutting every root in a ring at the same radius. Partial harvest cuts on one side only. It never travels all the way around.
Step 1: Identify the Plant and Check Whether It May Be Harvested
Get the name right before you touch the soil. Look at leaf arrangement, leaf margin, venation, stem shape, flower or fruit, and the smell of a crushed leaf where the species is known for one. Photograph the whole plant, then the flower, then a leaf, and take a specimen to a herbarium or a local botanist if you are not certain.
Then check four things: whether the species is protected in your region, whether it is listed as a species of conservation concern, whether the population you are looking at already looks thin, and whether local rules restrict medicinal plant collection or digging on that land type. Some jurisdictions require a permit for any commercial collection of a native medicinal species, and national parks and most reserves prohibit collection entirely.
If identification is uncertain, do not dig. The cost of being wrong is a dead plant and, for a rare species, a legal problem. Put the soil back, step away, and get the name confirmed. Everything else in this guide depends on that one answer being right.
Step 2: Confirm Permission and Assess Plant Health
Ask the landowner, land manager or park authority before you dig, and get an answer you can point to later if needed. Permission covers entry as well as harvesting, and on tribal, customary or community-managed land it also touches harvest rights that are not yours to assume.
Next, look at the plant rather than at your need. A plant that is already stressed by drought, disease, insect damage, grazing or recent transplanting is carrying reserves it cannot replace, so leave it alone this season. A young plant — first-year biennials, seedlings, anything still establishing — should be left entirely. Only mature, stable individuals that are not supporting seedlings nearby should be considered.
Check the population, not just the plant. If you can see plenty of small individuals regenerating nearby, a small selective harvest is defensible. If the stand is three plants in a wide area, take nothing.
Step 3: Plan a Small, Selective Harvest
Decide the quantity before you start, and write it down. A widely used framework for wild populations is tiered: for at-risk or rare species take as little as one plant in fifty, and in many cases take none; for common native perennials one plant in twenty is a reasonable ceiling; for any population, never collect more than a fifth of the individuals present. These are ceilings, not targets.
Introduced and invasive species are treated differently because removing them works against the population rather than against it. Himalayan blackberry and Japanese knotweed can be dug out and removed without any conservation concern, though you still have to identify them correctly. Popular garden cultivars, by contrast, deserve the same care as wild plants.
Plan the smallest harvest that meets your need. If a handful of root will do, dig one plant, not a patch. If the same species grows a few metres away, leave that one untouched. Spread your collection across the population rather than taking everything from one spot, because repeatedly disturbing one patch damages the soil structure and cuts the fungal networks that feed the plants.
Handle the material once it is out. Brush soil off dry rather than washing it, since washing drives moisture into the root tissue and slows drying. Slice thick roots into pieces small enough to dry evenly, dry them on a rack or in a dehydrator at 118°F or lower, and store dry material in labelled glass jars out of light. Handle fresh material with gloves and wash your hands afterwards.
Step 4: Loosen the Soil Without Cutting the Root
Timing comes before technique. Roots hold the most stored energy at the end of the growing season, so late autumn after the foliage has died back, or early spring before new growth starts, is the standard window. Avoid digging in heat and avoid digging waterlogged or frozen soil, because a hole you cannot shape in mud means a torn crown.
Water dry soil the day before if you can. Then work from the outside in, standing back far enough that your boot is not over the plant’s own root zone. Insert the hori hori knife or digging stick at the outer edge of where you believe the roots spread, angle it inward, and lever the soil up in a wedge. Repeat on a few sides, circling the plant, rather than going deep in one trench.
Follow the root with your fingers once it is visible. Feel along it, and cut only what you have decided to take. A shovel is the wrong tool here because its straight edge chops through everything it meets, including the feeder roots you meant to keep, and it severs neighbouring plants as it goes. That is also the most common complaint in gardening and landscaping forums: plants that were dying a season or two after a dig, with no obvious cause at the time, because far more root went than intended.
If you are lifting a whole plant rather than taking a piece, the difference between a clean lift and a torn crown is in the last few seconds. Loosen generously, get under the ball with the knife handle, and rotate and lift while holding the stem base — a twisting, wiggling motion rather than a straight pull. Straight pulling tears the crown, and a torn crown is the most common reason a supposedly moved perennial actually dies.
Step 5: Remove Only the Needed Portion
Once the root is exposed, choose the cut point. On a large perennial, take a lateral or peripheral root, leaving the main root intact. On a plant you intend to divide, make the cut well below a growing point so each piece has both root and a bud of new shoot. On a woody-rooted medicinal plant, a length of root bark from one lateral root can be taken without touching the trunk or the main root, which is the technique traditionally used on species such as Devil’s Club, where removing the whole plant means losing the stand.
Keep at least two-thirds of the root system in the ground. That is a workable rule of thumb for fibrous-rooted perennials, and it holds better than any vague instruction to harvest lightly. The remaining roots also have to keep their root-to-shoot ratio roughly intact: a plant cut back hard above ground can support less root below, which is another argument for trimming foliage and roots in proportion rather than taking roots alone.
Rub wood ash onto any cut surface on the part of the plant that stays behind. It helps seal the wound and is a common field practice. If you cut the top growth, cut it above a leaf node so the plant can reshoot from a node rather than from a bare stem.
Choose a small sample over a whole lift whenever the small sample will serve. Most herbal root work needs a slice, and a lifted taproot-plant buys you nothing but a dead clump. If the plant does have to be lifted and moved, this is a relocation, not a harvest, and the recovery rules are stricter.
Step 6: Replant, Backfill, and Check Recovery
This is the part almost every other guide on the topic skips, and it is where a partial harvest succeeds or fails. Return the plant’s own soil to its own hole, in the same orientation, with the crown at the same depth it was before. A replanted crown sitting half a centimetre deeper will rot; one sitting higher will dry out.
Lay any roots you loosened back along the trench rather than letting them hang in an air pocket, and press the soil gently around them. Do not stomp it down. Fill the hole, water it in to settle the soil and close air gaps, and mulch over the top without burying the crown.
Then leave it alone. No fertilizer for a season, because the plant has no root surface left to take it up and rich feeding can push soft growth onto a stressed plant. No walking over that spot, no future digging nearby, no new planting into the same bed, and no more harvesting from that plant next year.
Mark the site if anything is likely to be disturbed, and check it through the following growing season. Healthy recovery looks like: new shoots or buds from the crown within weeks in the growing season, leaves that match the size and colour of what the plant was producing before, steady growth rather than a sudden decline, and no soft or dark tissue at the crown. A plant that wilts in heat but recovers by evening is stressed but alive. A plant that wilts in cool morning air and never recovers, or that sheds leaves early, is declining and should be left entirely alone next season.
Give it a full growing season before judging. Many perennial root losses only show up in the second year, when stored reserves run out, which is why the case for conservative collection is built on slow losses rather than obvious ones.
Common Mistakes
Almost every damaged plant comes from one of a short list of mistakes. The fix for each is short, which makes them easy to avoid.
Digging before you have a confirmed identification. Some species are protected and some are dangerously toxic, and a misidentification is the root cause of a surprising number of hospital admissions. Confirm the name first; skip the plant entirely if you cannot.
Harvesting without permission. Private land, reserves and protected areas all have rules, and unauthorized collection carries legal consequences that do not depend on how small your sample was. Get an answer from the land manager in advance.
Taking roots from young or stressed plants. A first-year plant has not built reserves, and a drought-stressed or diseased plant is spending what it has. Skip both, no matter how good the specimen looks.
Collecting too much from one spot. More than a fifth of a population, or more than one in twenty for a common native, and repeated harvest from the same patch, erodes a stand quietly over years. Move to another area rather than returning to the easiest clump.
Digging in wet or compacted soil. You cannot shape a clean hole, so the crown tears. Water dry soil a day ahead and dig friable ground instead.
Cutting the crown. A severed crown is a dead plant even when most of the root system is still in the ground. Cut lateral roots, leave the crown and its bud intact, and set the cut angle cleanly.
Lifting an entire perennial unnecessarily. Gardeners routinely pull whole clumps when a slice of lateral root would have done. Most of those plants never come back.
Using a shovel. A shovel edge cuts indiscriminately through feeder roots and neighbouring plants. Work from the outer edge with a hori hori knife or digging stick.
Cutting surface roots instead of fixing the cause. Where a root surfaces in a path or a bed, the better answer in landscaping advice is usually to raise the soil level over it, extend the bed, or install a barrier — not to cut the root. Cutting invites a second root to surface nearby.
Never checking whether the plant came back. Without a follow-up check you cannot tell whether your ratio was conservative enough, and you will repeat the same mistake on the same clump next season.
| What you see | Likely cause | What to do |
|---|---|---|
| No regrowth the following spring, crown soft and dark | Crown damaged in the cut, replanted too deep, or watered into rot | Stop disturbing the site; note the depth used next time and replant crowns at their original level |
| Wilting in cool weather, leaves dropping early in the season | Too much of the root system removed | Leave the plant untouched for a full year and stop taking from it; propagation from divisions is safer than further harvest |
| Wilting in afternoon heat but recovering by evening | Normal stress while root loss heals | Water deeply in dry weather, mulch, and keep foot traffic off the spot |
| New growth only from the outer edge, centre dead | Crown rot, often from over-watering or burial | Remove dead tissue, improve drainage around the crown, and do not add fertilizer this season |
Frequently Asked Questions
Does harvesting roots always kill the plant?
No, but it does for a large group of species. A plant with a single taproot, a bulb or a corm usually dies when dug, because the removed organ is the plant’s storage and anchoring system. Plants with fibrous root systems, rhizomes or adventitious roots can survive partial harvest if the crown survives and at least two-thirds of the root mass stays in the ground. Check the root type before you dig.
Will a plant grow back if I cut its root?
Most healthy plants do, as long as the cut is partial and the crown is intact. Cut lateral or peripheral roots on one side, leave the main root, the crown and the bud, and rub wood ash on the cut. Never sever a complete ring of roots at the same radius, and never cut the crown itself. Stressed, young or diseased plants are far less likely to reshoot.
When is the best time to harvest roots?
Late autumn after the foliage dies back, or early spring before new growth starts, when the plant has stored the most energy in its roots and is not drawing on those reserves. Avoid heat, drought stress and frozen ground. Avoid saturated soil, because you cannot shape a clean hole in mud and a torn crown is usually what kills the plant.
How much of the root system can I remove without killing the plant?
Treat two-thirds as the working rule for fibrous-rooted perennials, so no more than a third comes out. For populations, never take more than a fifth of the individuals present, and for a common native keep to one plant in twenty; for at-risk species the ceiling is far lower, and take none. Cut on one side only, since a full ring of cuts girdles the plant.
Can a plant survive being moved if you dig it up?
Often, yes, and the difference between success and a dead plant is in the last few seconds of the dig. Loosen generously from the outer edge, get underneath with the knife handle, and twist and lift while holding the stem base rather than pulling straight up. Replant at the same depth, backfill with its own soil, water in, mulch, skip fertilizer for a season, and keep people off the spot.
How do you know whether a species is legally protected?
Check the local protected species list for your region and the rules for the specific land you are on, since reserves and national parks prohibit collection outright. United Plant Savers and regional conservation bodies list at-risk species by name, and that is the fastest check before a medicinal or wild-harvest dig. Some jurisdictions also require a permit for commercial collection. If the status is unclear, ask the land manager and do not dig.
Conclusion
The safest root harvest begins before any tool comes out: a confirmed identification, a legal right to be on the land and to dig, and a check that the species is not protected or already thin on the ground. After that, take less than you want. Choose the outermost or lateral root, leave at least two-thirds of the system, cut on one side only, and keep the crown and its bud whole.
Then do the part most people skip. Backfill with the plant’s own soil, put the crown at its original depth, water it in, mulch, keep the spot clear of feet and fertilizer for a season, and go back next year to see what happened. That last check is how you find out whether your ratio was right, and it is the difference between harvesting that can be repeated for decades and harvesting that quietly empties a hillside.
If a species is rare, listed, protected, or simply not something you are certain about, ask a botanist, your regional conservation body, or a local Indigenous or traditional harvester. They hold site knowledge that no written guide replaces, and they will tell you quickly whether the answer is a small harvest or none at all.