A cold infusion is a drink made by steeping an ingredient in room-temperature or refrigerator-cold water for hours instead of minutes, then straining it out. Learning how to make a cold infusion at home takes about ten minutes of hands-on work plus a few hours of waiting. The method itself is short: a modest amount of a correctly identified, food-grade ingredient goes into a clean jar, cold filtered water goes over the top, and the jar spends the rest of the day in the fridge.
This guide is about preparing a beverage. It is not a treatment plan, and nothing here is meant to diagnose, prevent or treat a disease. If you have allergies, take any medication, are pregnant or breastfeeding, or manage a kidney, liver or heart condition, check with a doctor or pharmacist before you start.
One clarification up front, because it is the phrase people search on: cold here mostly means not hot. Water sitting on the counter at room temperature counts as a cold infusion, and so does refrigerator-cold water. Heat is what separates this from a tea or a decoction.
Table of Contents
- 1What You Need to Make a Cold Infusion
- 2Step-by-Step
- 31. Choose an Ingredient Safe for Cold Steeping
- 42. How to Make a Cold Infusion: Combine and Steep
- 53. Taste, Strain, and Adjust
- 64. Check the Infusion Before Drinking
- 75. Store and Serve the Finished Infusion
- 8Common Mistakes
- 9Tips for a Better Cold Infusion
- 10Frequently Asked Questions
- 11What is the difference between a cold infusion and hot tea?
- 12Can I leave an infusion in the refrigerator overnight?
- 13Should I heat or reheat a cold infusion?
- 14Why is my cold infusion stronger or weaker than expected?
- 15Does traditional use prove that an herb is safe?
- 16Conclusion
What You Need to Make a Cold Infusion
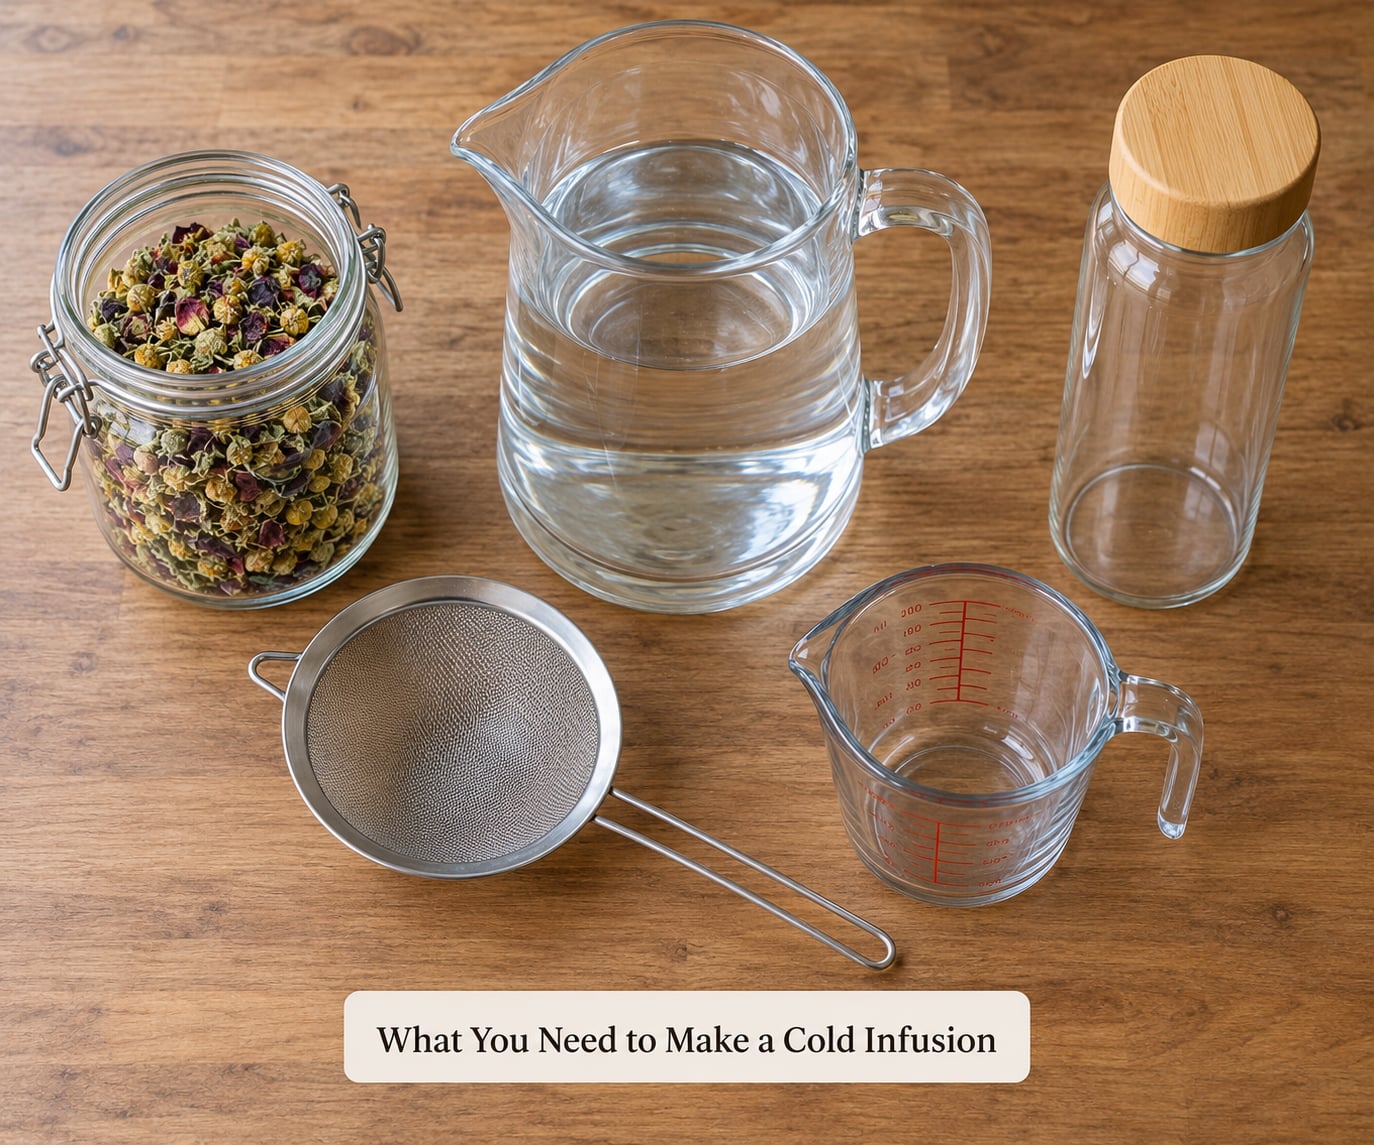
You need fewer things than most people expect, and nothing that needs power.
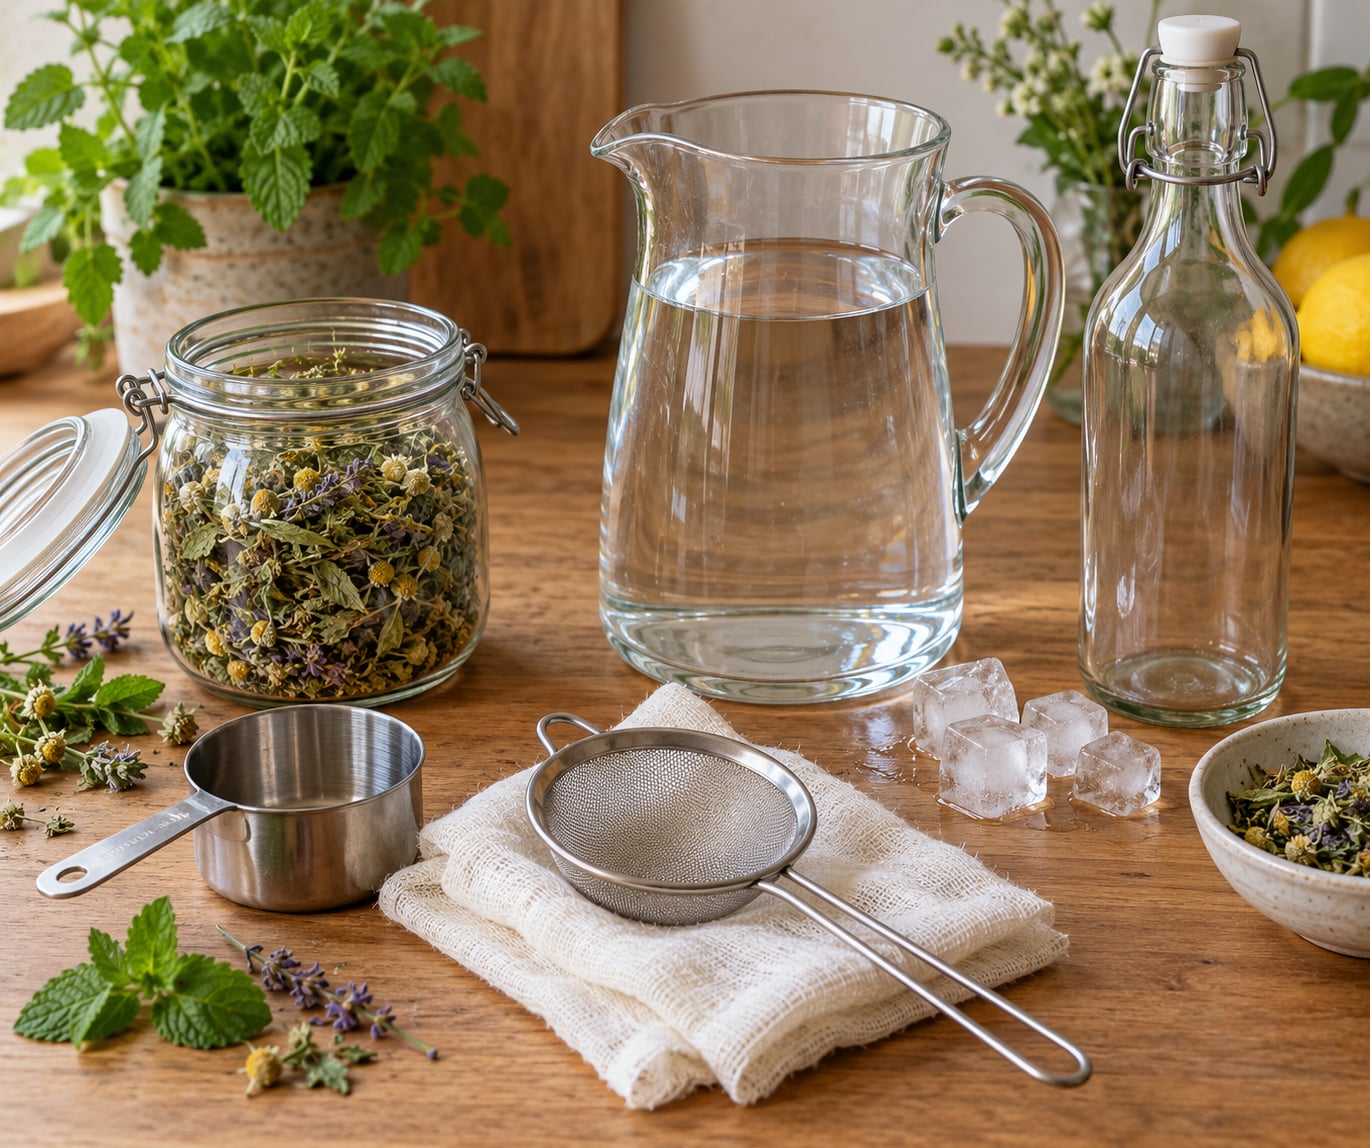
- A clean glass jar or bottle with a tight lid, washed in hot soapy water and dried properly.
- Filtered water, cold from the fridge or straight off the filter.
- A fine-mesh strainer, a clean square of cheesecloth, or a nut-bag style filter.
- A measuring cup or a small kitchen scale, so the ratio is repeatable next time.
- Ice, and a jug or glass to serve from.
That is the whole kit. No stove, no thermometer, no special equipment, which is part of why this method travels well in a household where the pot is already busy.
One rule outranks the equipment. Use only substances you can positively identify and that are meant for culinary or beverage use. Buy them from a reputable seller and keep the botanical name on the label, because common names get reused for entirely different plants.
Long traditional use is a reason to read a plant’s documentation, not a reason to skip it.
Step-by-Step
Five stages, in order. The first one is the only one that can go really wrong, so give it a minute.
1. Choose an Ingredient Safe for Cold Steeping
Start with a single ingredient. Working with one plant at a time keeps the taste readable, and it means you know exactly what is in the glass.
Check the name before you check the flavour. Look for the botanical name printed next to the common name, and walk away from anything sold loose, unnamed or relabelled by hand.
Three habits cause most of the trouble at this stage:
- Do not forage unidentified plants. A lookalike is not a small mistake, it is a medical emergency.
- Do not substitute a concentrated extract or tincture for the plant itself. A few drops of extract are not a spoonful of herb, and the two behave completely differently in water.
- Do not assume a plant is safe because people have used it for a long time. Centuries of use in one community tell you the plant is worth studying, not that any amount suits every person.
For a starting ratio, treat this as an ordinary beverage rather than a medicinal dose: about 5 g of dried material per 500 ml of water, roughly a rounded tablespoon. Kitchen scales rarely weigh that precisely, so the tablespoon is the practical version of the same number. Bitter roots and barks used across African and other traditional food and drink traditions are often prepared this way, and they are the reason to start lighter than you think.
2. How to Make a Cold Infusion: Combine and Steep
- Wash and dry the jar and its lid.
- Measure the ingredient in and drop it into the bottom of the jar.
- Pour cold filtered water over it, filling the jar and leaving about 2 cm of headspace so the liquid has room to expand as it chills.
- Close the lid. A cover is not optional, since it blocks dust, spills and anything small that crawls.
- Refrigerate for 4 to 8 hours, or overnight for up to about 12 hours. Keep the jar cold the whole time.
You will know it worked by looking at the water. A finished cold infusion changes: the colour deepens, the liquid takes on a distinct aroma, and a faint cloudiness or film appears and shifts when you swirl the glass. Clear water with no aroma after eight hours usually means too little material went in, or that the material had little water-soluble content to give.
Bitterness behaves differently from aroma. It tends to build early, peak in the first half hour or so of tasting, then settle into something rounder between hours three and six. That is why the same jar tastes sharper at hour two than it does at hour six, and why an overnight infusion is often the mildest one.
3. Taste, Strain, and Adjust
Pour the liquid through a fine-mesh strainer or a doubled layer of cheesecloth into a clean glass. Resist squeezing the material hard; pressing pushes fine particles and sediment straight through the mesh and leaves you with grit in the bottom.
Taste it plain, before anything goes in. It will be stronger than the aroma suggested, so if it tastes intense, dilute with more cold filtered water until it reads as a drink instead of a tincture, then pour over ice.
For flavour, cook rather than remedy. A strip of lemon or orange peel softens a bitter root. A few slices of fresh ginger, bruised in your palm first, give a sharp root or bark some warmth. A handful of fresh mint or lemon balm added in the final hour keeps its aroma. A small spoon of honey stirred in at the end handles bitterness that dilution alone will not.
Those additions are for taste. Citrus, ginger and honey do not change what the infusion is, and adding them does not make it a remedy for anything.
4. Check the Infusion Before Drinking
Look at the glass before you drink from it. Discard the batch if the liquid stays cloudy when you swirl it, if a film sits on the surface, if the smell is sour or off, if you see mould, or if it is fizzing when you added nothing fizzy.
The most important check happened earlier, in the fridge. An infusion that spends hours near room temperature is a food-safety problem, not a flavour problem, and the safe range that matters is the 40 to 140°F band. Keeping the water cold is both the extraction method and the preservation method.
A clear, good-smelling infusion still cannot tell you whether a plant suits you or whether it interacts with your medication. Appearance is not a safety test. If you feel unwell after drinking it, stop drinking it and get advice. Trouble breathing, swelling of the face or throat, or vomiting that will not settle needs urgent medical care rather than a second glass.
5. Store and Serve the Finished Infusion
Move the strained liquid into a clean bottle or jar, keep it covered, and refrigerate at or below 4°C. Write the preparation date on masking tape or on the lid with a permanent marker, because a row of identical fridge jars tells you nothing after two days.
Trust the date rather than your nose. Drink it the same day if it is for anyone whose health you would worry about, and within roughly 2 to 3 days for an ordinary home infusion. When the date passes, pour it out, no matter how it smells.
Serve it over ice, or dilute generously as you pour. A single batch can cover a couple of refills if you water it down rather than serving it straight.
Common Mistakes
Nearly every failed batch comes down to one of these.
- Using unidentified plants. The correction is simple: use a labelled, correctly identified ingredient from a reputable source, and never forage material you cannot identify yourself.
- Confusing a cold infusion with a long decoction. A decoction is simmered hard for a long time; an infusion is steeped in unheated water. The correction is no heat at any stage, including a warm rinse beforehand.
- Making an overly concentrated drink. Correction: start at about 5 g per 500 ml, taste, then dilute. Strength can be added but never taken back out.
- Leaving the container uncovered. Correction: use a lid and keep a finger of headspace above the liquid.
- Reheating it. Correction: serve it cold over ice. If you want something warm, make a fresh hot infusion instead.
- Treating tradition as proof. Correction: long traditional use is a reason to look up the plant carefully, not a substitute for looking it up carefully.
- Using it in place of medical care. Correction: for a persistent sore throat, a headache or anything that is not settling, speak to a clinician.
The sun-tea method deserves its own warning, because it is recommended all over the place. A jar sitting on a warm windowsill for hours holds water in exactly that 40 to 140°F band, which is the range food safety guidance treats as the danger zone. Refrigerate the whole time.
Tips for a Better Cold Infusion
- Start with a spotless jar. Residue from the last batch changes the flavour and hands bacteria something to eat.
- Use cool filtered water. Very hard water flattens aroma, and filtered water tastes cleaner straight through.
- Treat steep time as a dial, not a setting. Taste at three hours, taste again at six, and pull it when the flavour suits you.
- Keep the material under the water. Anything floating above the line moulds before it extracts anything.
- Chill the finished drink quickly. Strain it, get it straight back into the fridge, and pour small glasses rather than one big jug.
- Label with the start date. Masking tape and a marker take about five seconds.
- For bitter roots and barks, cold is the gentler route. Heat drags bitter tannins out of tough material harder than cold water does, and a cold steep is often simply easier to drink.
Mucilaginous material is the classic case where cold is not a preference but the right method. Marshmallow leaf and plantain leaf swell into a slippery coating in cool water; hot water can scald that coating into a slimy layer that sits unpleasant at the bottom of the glass. Follow the instructions on a reliable product or a trusted reference for that specific plant rather than a general rule.
Frequently Asked Questions
What is the difference between a cold infusion and hot tea?
A cold infusion is steeped in unheated water, either room temperature or refrigerator cold, for four to eight hours or up to about twelve overnight. Hot tea uses near-boiling water for a few minutes. Cold water extracts slowly and draws out far less bitterness and fewer astringent tannins, which is why the drink tastes smoother and softer. Heat-sensitive and volatile compounds also survive better. Neither method is a treatment.
Can I leave an infusion in the refrigerator overnight?
Yes, and it is one of the standard methods. Fridge-cold steeping for four to eight hours, or overnight up to roughly twelve, is the usual window. Keep the jar covered and cold for the entire time, and never move it to a warm windowsill partway through. Go past about twelve hours and you gain little flavour while the risk of microbial growth quietly rises. Label the jar with the start date so you are not guessing.
Should I heat or reheat a cold infusion?
Do not reheat it. You are not making hot tea, and reheating changes what you prepared: it drives off the volatile aromatics, pulls more bitterness from the plant material, and pushes the liquid through the temperature range where bacteria multiply. If you want a warm drink, prepare a fresh hot infusion with a different method. If a cold infusion has been sitting out or past its date, reheat it, freeze it or dilute it. Pour it out.
Why is my cold infusion stronger or weaker than expected?
Three things drive it. The amount of material per litre matters most, so weigh or spoon it rather than eyeballing. Particle size matters too, because torn or powdered material gives up its contents faster than a whole leaf. Finally, different plants simply behave differently. Bitter roots and barks yield far more than delicate leaves and flowers. Start at about 5 g per 500 ml, taste early, and dilute with cold filtered water if it is stronger than you wanted.
Does traditional use prove that an herb is safe?
No. It is meaningful evidence about a plant’s history and worth real study, but it does not tell you the safe amount for you, how it interacts with your medication, or how it affects pregnancy, breastfeeding, children or a specific health condition. Preparations also vary widely between traditions and between one preparation and the next. Treat traditional use as a reason to investigate a plant with sources and a clinician, not as a safety certificate.
Conclusion
To make a cold infusion, the first action is simple: pick a correctly identified, food-grade ingredient, then combine it with cold filtered water in a clean covered jar and refrigerate it for four to eight hours using the steps above. Taste it plain at the end, dilute if it is strong, and strain before serving.
Keep it cold the whole time, label the jar with the date, and drink it within about two to three days. If you have allergies, take medication, are pregnant or breastfeeding, or have a health condition, talk to a doctor or pharmacist before you start. Severe symptoms after drinking anything, such as trouble breathing or swelling, need urgent medical care.