How to make a tincture with dried roots comes down to three numbers: one ounce of dried root by weight, five fluid ounces of food-grade alcohol, and a wait of about six weeks. That is the folkloric ratio most home herbalists start from, and the process itself is simple once your equipment is clean and your plant identification is certain.
This guide covers the technique, not the medicine. It explains how to extract, strain, label and store a dried root tincture, and it deliberately stops short of telling you what to take it for or how much to take. Before you prepare or ingest any herbal preparation, talk to a qualified botanical or healthcare professional, especially if you take any medication.
Table of Contents
- 1What You Need
- 2Step-by-Step
- 3How to Make a Tincture With Dried Roots Safely
- 4Prepare the Jar and Dried Root
- 5Combine the Root With Suitable Alcohol
- 6Macerate the Root and Watch the Jar
- 7Strain and Label the Finished Tincture
- 8Common Mistakes
- 9Frequently Asked Questions
- 10Can I make a root tincture with vodka instead of a higher-proof alcohol?
- 11Is every dried root safe to put in a tincture?
- 12What if the dried root smells unusual or the liquid becomes cloudy?
- 13Can I make a tincture without alcohol using glycerin or water?
- 14How should I store a homemade root tincture, and how long should it last?
- 15Can I take a homemade root tincture alongside medicines or supplements?
- 16Conclusion
What You Need
Root tincturing needs very little equipment, and the whole list can be assembled in one trip. What matters more than the gear is that every item is clean, dry, and free of residue from a previous batch.
- Verified dried root — a known botanical identity, a recorded source, and no mold, dampness, or chemical residue.
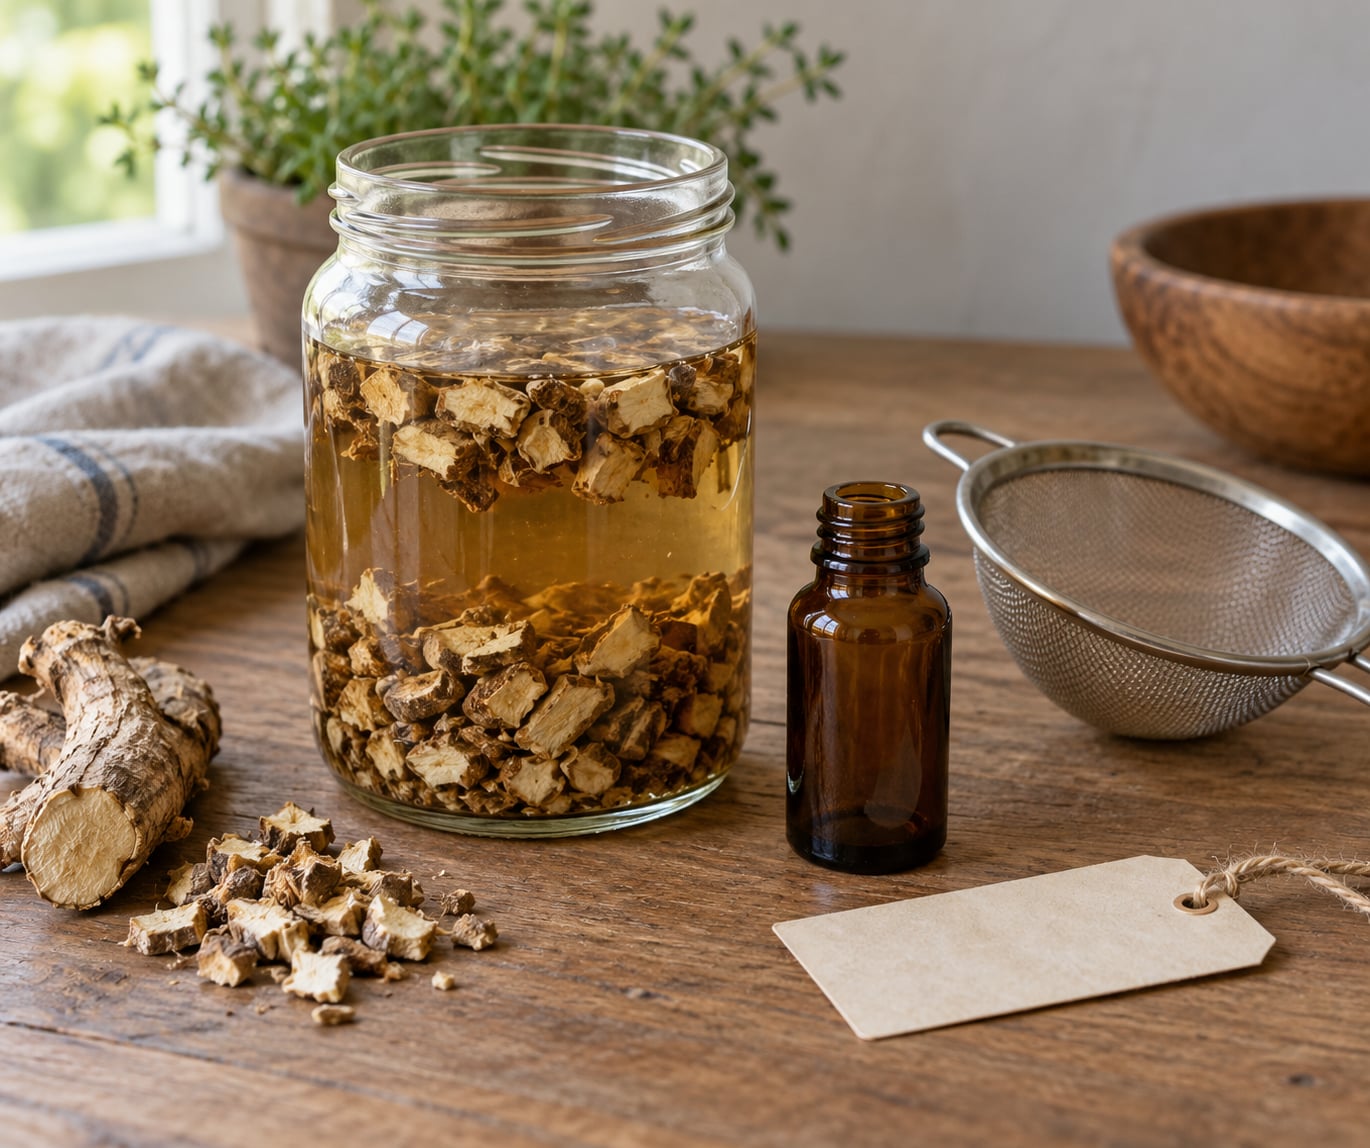
- Food-safe glass jar with a tight lid — wide mouth so you can get a hand and a spoon in, sized so the root fills roughly half of it.
- Funnel — helps you load root without spilling and keeps fingers out of the menstruum.
- Fine strainer or filter — a mesh strainer, coffee filter, or several layers of cheesecloth for the straining stage.
- Clean labels and a pen — for the botanical name, part used, solvent, ratio, and preparation date.
- Gloves — especially when handling roots that can stain skin or irritate hands.
- Suitable high-proof food-grade alcohol — 100-proof vodka is the usual starting point for roots; 80-proof works for many materials but extracts less.
- Dark storage space — a cool cupboard or cabinet that does not see direct light.
- Amber glass dropper or storage bottles — for the finished tincture, with lids that seal completely.
A kitchen scale helps more than it sounds like it should. Volume measurements go wrong with dried root because pieces pack differently, and a weight-based ratio is the only way to reproduce a batch consistently.
Clean, fully dry equipment is not a nicety here. Residual water dilutes the solvent, and residual plant matter or sugar from a previous batch can introduce microbes into a jar that will sit sealed for weeks. Sterilize the jar and tools, then let them dry completely before anything touches them.
The 1:5 ratio below is the starting point. Adjust volume to your jar, not the other way round, and adjust the ratio for fresh material or for a part other than root.
- Dried root: 1:5 by weight to fluid ounces, 100-proof (50% ABV), six weeks minimum.
- Dried root that is very dense or resinous: 1:5, higher proof if you have it, six to eight weeks.
- Dried bark: 1:5, 100-proof (50% ABV), six weeks.
- Dried seed or berry: 1:5, 100-proof (50% ABV), four weeks.
- Dried leaf or flower: 1:2, 80-proof (40% ABV) or higher, two to four weeks.
- Fresh root, cut: 1:2 to 1:3, 100-proof (50% ABV), four weeks.
Roots and barks hold up better through drying than leaves and flowers do, and that is the practical reason the 1:5 figure exists. Dried leaf tissue loses more of what you are extracting during drying, so less of it is available to come back out into the menstruum.
Last reviewed for accuracy in 2026.
Step-by-Step
How to Make a Tincture With Dried Roots Safely
Safety starts before the jar ever comes out. Confirm the plant’s botanical name from more than one reliable source, and if anything about the identity is uncertain, do not proceed.
Inspect the dried root under good light. Discard anything with fuzzy growth, dark blotches, a musty or sour smell, visible dampness, or a chemical or solvent odor that does not belong to the plant.
Ask a qualified botanical or healthcare professional whether the plant is appropriate for you, and check with a pharmacist before ingesting anything alongside prescription medication or supplements.
Prepare the Jar and Dried Root
Wash the jar, lid, funnel and strainer, then sterilize them and let them dry fully on a clean surface. A single drop of leftover water changes the solvent strength for the whole batch.
Break the dried root into pieces roughly the size of a small pea. Finer pieces give a faster extraction; a powder can turn the finished tincture cloudy and make straining difficult.
Write down the botanical name, the part used, the source, and the date before the root goes anywhere near liquid. If you cannot state where the material came from, you cannot vouch for it, and the label becomes the only record of what is inside the jar.
Weigh the prepared root on the scale. One ounce to five fluid ounces of alcohol is the ratio, so a quarter-ounce of root takes one and a quarter fluid ounces.
Combine the Root With Suitable Alcohol
Load the root through the funnel into the clean jar. Aim for the root to fill roughly half the jar by volume, which is a practical shortcut for hitting a weight ratio without guessing.
Pour in enough food-grade alcohol to cover every piece completely, with a little extra for the liquid the root will absorb during the first few days. Every piece must stay submerged; material that breaks the surface is the most common reason a root tincture under-extracts.
Tap the jar gently or stir with a clean utensil to release trapped air bubbles around the pieces. Bubbles left in the jar are pockets that never get wet.
Seal the lid, wipe the rim clean, and label the jar with the botanical name, part used, solvent and strength, the ratio, and the preparation date. A jar with no date is a jar you will throw out.
Store the sealed jar in a dark, cool cupboard away from sunlight and heat. Not on a windowsill, and not in a warm cupboard above the stove.
Macerate the Root and Watch the Jar
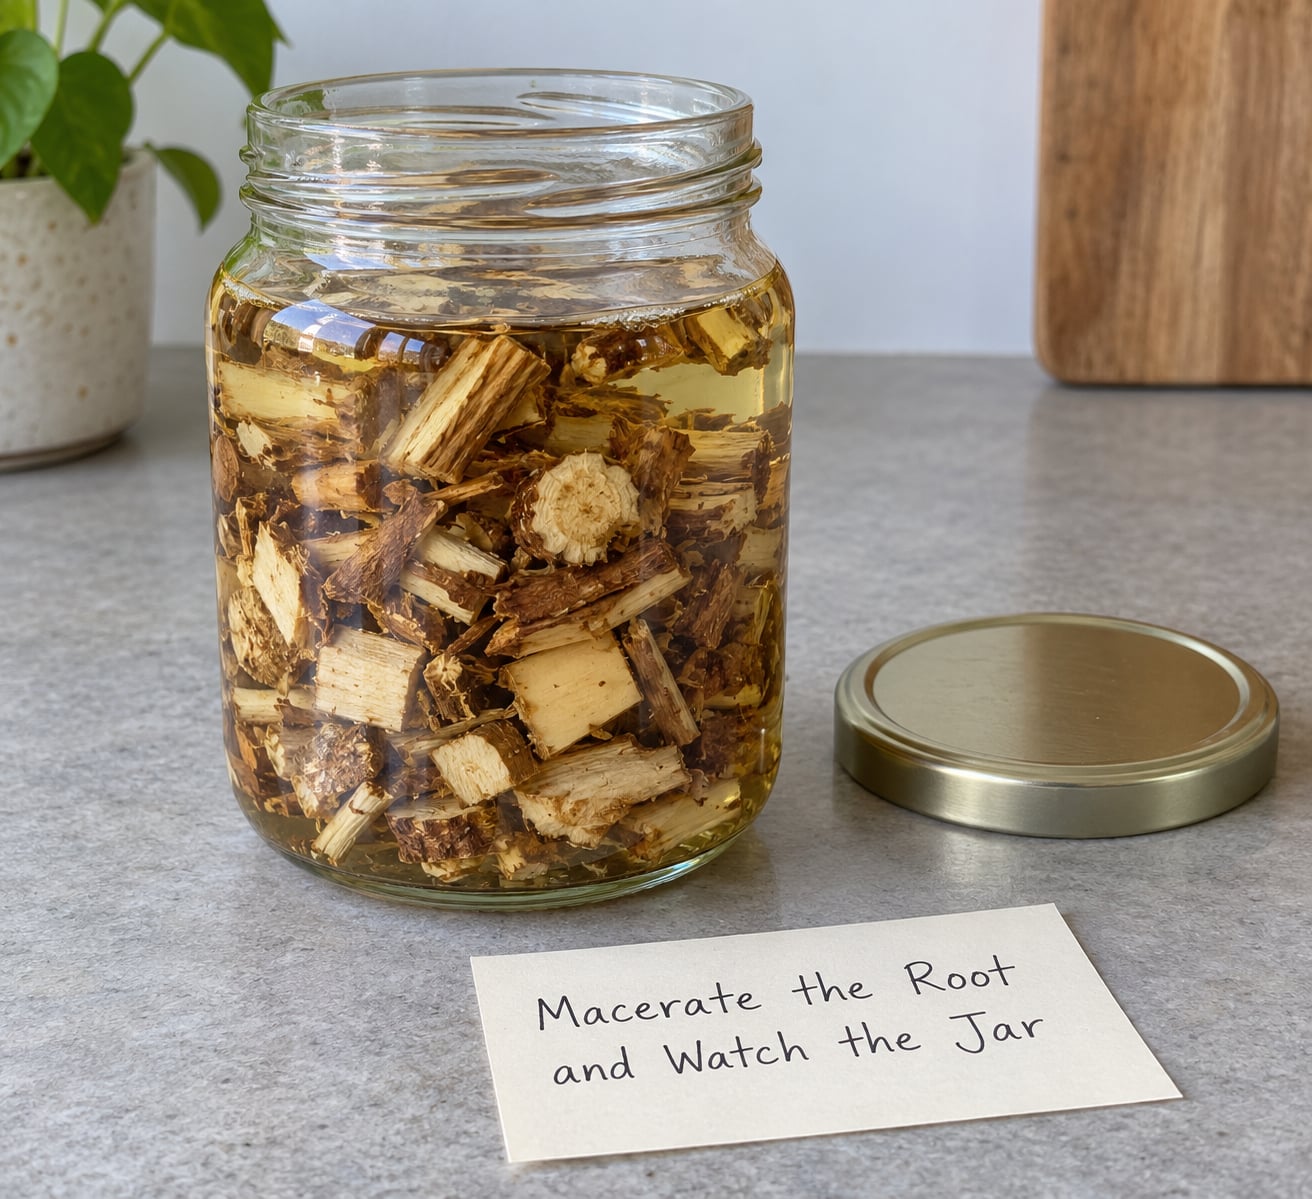
Maceration is the slow phase where the alcohol works as the solvent, drawing constituents out of the root and holding them in solution. For dried root, treat six weeks as the minimum rather than the target.
Once a week, lift the jar and look at it. Check that the root is still submerged, that the liquid level has not dropped, and that the lid has not leaked or bulged.
Top up with a little more of the same solvent if the level has fallen, since dried root and bark absorb noticeably more liquid than the ratio suggests. Add enough to cover everything again.
Watch for cloudiness that keeps growing, a film on the surface, fizzing, an unpleasant smell, or pressure when you open the lid. If you see any of those, stop and discard the batch rather than trying to salvage it.
Give the sealed jar a hard shake once a week. It is not a substitute for time, but it resettles the material and keeps the extraction even.
Strain and Label the Finished Tincture
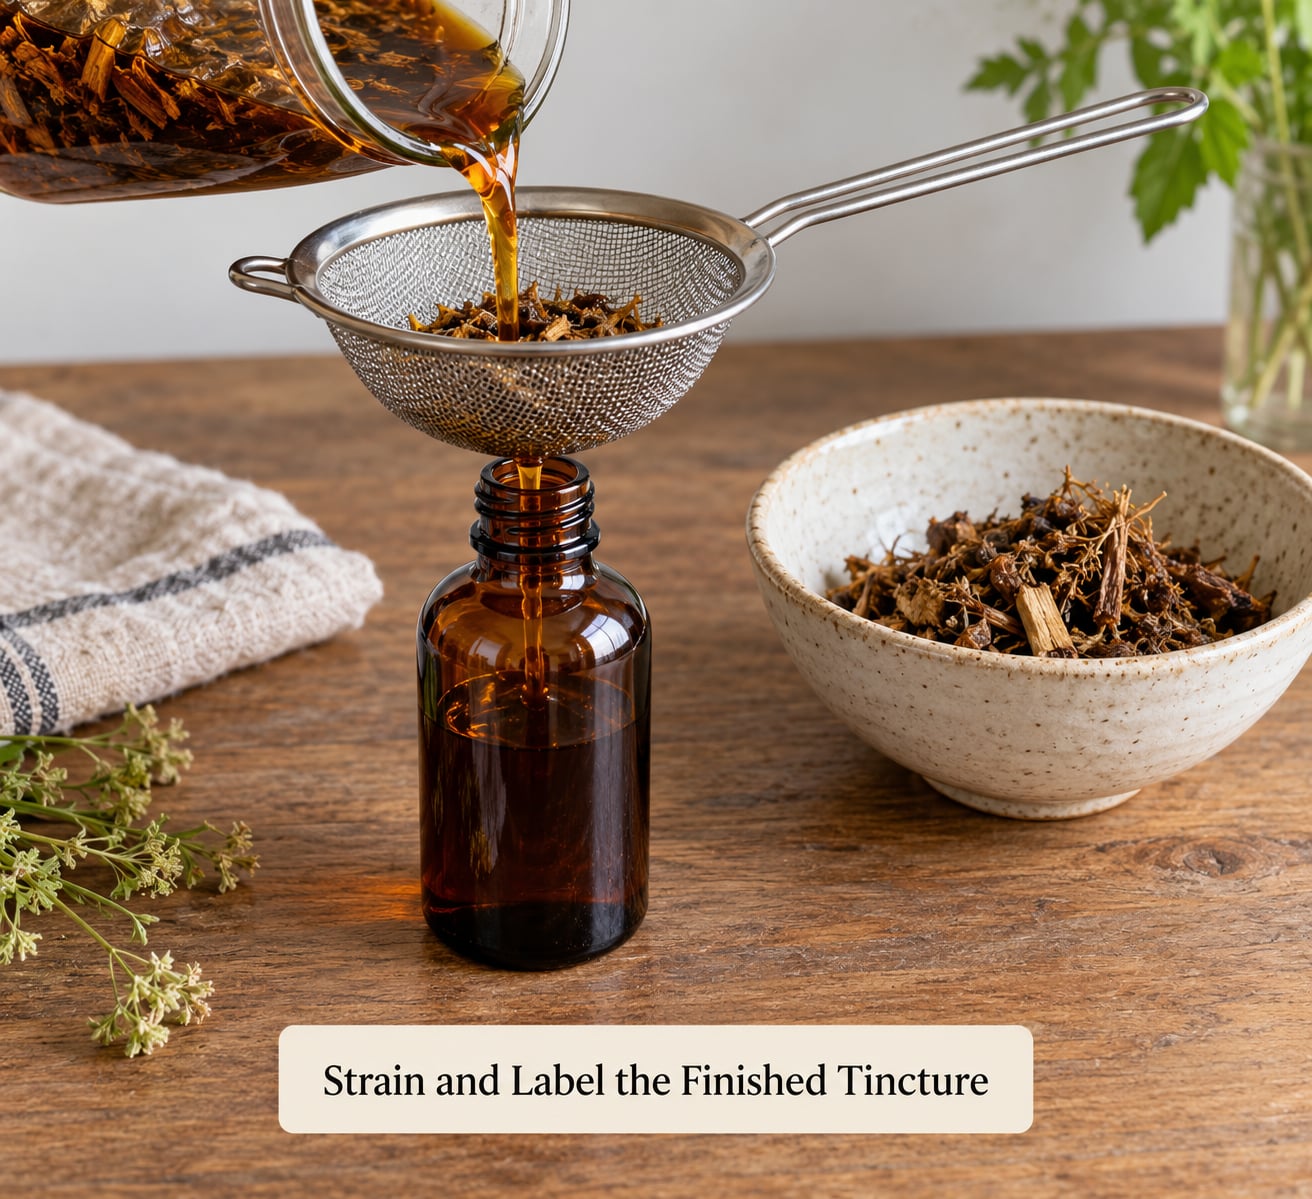
Set the clean strainer over a clean bowl or bottle and pour the contents of the jar through it. Press the spent root gently with a clean utensil to recover what is left, then discard the marc.
Let the liquid settle, then pour it into amber glass bottles and seal them. Amber glass matters more than people expect, because light degrades constituents over months.
Label each finished bottle with the botanical name, part used, solvent and strength, the ratio, the preparation date, and the straining date. Store the bottles in the same dark, cool place.
If the liquid is cloudy after straining, strain it a second time through a coffee filter. Some cloudiness is normal from fine root particles, but a filter pass gives you a cleaner result and a longer life in the bottle.
Common Mistakes
Nearly every failed root tincture comes down to one of a handful of avoidable problems.
Using a root you cannot identify. If you cannot state the botanical name confidently from more than one source, discard it or confirm it with a professional. Do not guess from a photograph or from a seller’s description alone.
Root that is damp or moldy. Discard it. Do not try to cut the bad parts off, and do not attempt to rescue a root that smells musty or sour.
Incomplete submersion. If any piece breaks the surface, add more solvent until everything is covered. Roots that sit half in and half out of the menstruum extract unevenly.
Not topping up as the jar drinks. Dried root and bark absorb more liquid than the starting ratio predicts. Check weekly and top up with the same solvent.
Alcohol that is too weak for the material. Leaves and flowers extract well at 80-proof. Roots generally want 100-proof or higher, because 40% ABV leaves water-soluble material in the marc.
Dirty or wet equipment. Sterilize and fully dry the jar, lid, funnel and strainer. Residual water dilutes the solvent and residual sugar feeds microbes.
A loose lid. A tight seal is what keeps air out and solvent in. If the lid does not hold, the jar is not a tincture jar, it is an open cup.
Containers that were not meant for it. Skip unheated plastic home containers and improvised jars. Use food-safe glass, which does not interact with the solvent.
No label. A label with the botanical name, part used, solvent, and date is the difference between a preparation you know and one you guess about later.
Storing it in the light. A windowsill or a clear bottle on a shelf degrades what you extracted. Dark glass, dark cupboard.
Judging it too early. Under-extraction is the most common complaint from first-time makers, and it comes from rushing the steep rather than from the method.
Two habits cover most of the rest: keep every batch written down so you can reproduce it, and keep every batch separate so a problem only costs you one jar.
One last safety note. A homemade preparation is not automatically safe to ingest, and the steps above describe technique rather than approval. If you plan to use what you make, or you want to combine it with anything else, speak to a qualified professional first.
Frequently Asked Questions
Can I make a root tincture with vodka instead of a higher-proof alcohol?
Yes, vodka works well for dried root. 80-proof (40% ABV) will extract a usable preparation, but 100-proof is the better choice for roots because the extra alcohol pulls more water-soluble constituents out of the root material. 40% ABV is the practical minimum for preserving a tincture at all. If you only have 80-proof, extend the steep rather than cutting it short, and expect a slightly milder extract from denser roots and bark.
Is every dried root safe to put in a tincture?
No. Some plants are toxic, and some are safe only in specific preparations or amounts, so plant identity comes first. Confirm the botanical name from more than one reliable source before you start, and discard material that is damp, moldy, discolored, or from a source you cannot verify. Before ingesting anything you make, speak to a qualified botanical or healthcare professional about the specific plant and your own health situation.
What if the dried root smells unusual or the liquid becomes cloudy?
Stop and inspect the jar before continuing. A musty, sour, or chemical odor, a film on the surface, active fizzing, or a swollen lid all point to contamination, and the safest move is to discard the batch. A little cloudiness from fine root particles during straining is normal and can be cleared with a second pass through a coffee filter. Cloudiness that keeps growing over weeks is not the same thing, and it is a reason to throw the batch out.
Can I make a tincture without alcohol using glycerin or water?
You can, but the result is a different preparation with a shorter life. Glycerites and vinegar preparations pull a narrower range of constituents, and because they contain water they spoil far faster than alcohol tinctures and need refrigeration. A water decoction keeps almost nothing and lasts days rather than months. If you avoid alcohol, treat these as short-term preparations and ask a professional which method suits the specific plant you are working with.
How should I store a homemade root tincture, and how long should it last?
Store sealed amber glass bottles in a cool, dark cupboard away from sunlight, heat, and kitchen steam, and keep them out of reach of children. A well-made alcohol tincture at 50% ABV or higher is stable for years, and many makers use preparations well past that. Check each bottle a few times a year for cloudiness, sediment, a film, or a change in smell, and discard anything that has changed. Label every bottle with the preparation date so you know what you are looking at.
Can I take a homemade root tincture alongside medicines or supplements?
Speak to a pharmacist or doctor first, every time. Herbal preparations can interact with prescription medicines and with over-the-counter supplements in ways that are not obvious from the label, and a homemade preparation has a known plant and an unknown dose. This is not a question to answer by reading ingredient lists, and it is not something any article can settle for you. Bring the botanical name and the part used to the conversation so the advice is specific.
Conclusion
If you are starting from scratch, the first action is identification, not the jar. Confirm the botanical name and the source of your dried root, have a qualified botanical or healthcare professional confirm it is appropriate for you, and only then set out clean, fully dried equipment and a food-grade solvent of the right strength.
From there the method is straightforward: one ounce of dried root to five fluid ounces of 100-proof alcohol, fully submerged, sealed, dark, and left for at least six weeks with a weekly check on the jar. Strain it, bottle it in amber glass, label it, and store it away from light.
None of that makes a homemade preparation safe to ingest on its own. Preparation quality is not the same thing as suitability, and if you plan to take what you make, or combine it with anything else, that is a conversation to have with a professional before you start.